


From Punched Cards to Prompts
AndroidIntroduction When computer programming was young, code was punched into cards. That is, holes were punched into a piece of cardboard in a format...
Every Android programmer will at some point customize a ListView row by creating their own layout and populating it with data. When that happens, you’ll probably reach for the Holder pattern. But the Holder pattern is clumsy and full of boilerplate, and we can do better. In this post, we explore an alternative that uses a subclass of RelativeLayoutto encapsulate the customization work.
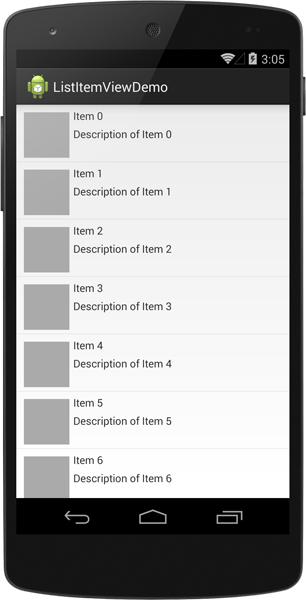
For demonstration purposes, we’ll create a typical simple custom ListView row with an ImageView and two TextViews arranged inside a RelativeLayout parent. You can see what it looks like in the screen shot below. You can find the code for this example project on GitHub.
When creating custom views for a ListView or other AdapterView, we have a few requirements:
Use a custom layout to define the arrangement of child views.
Take advantage of view recycling when scrolling.
Efficiently identify and populate child views with data.
Since this is such a common problem, patterns have emerged. One implementation you see described all over the Internet is called “the holder pattern.” In a nutshell, it entails these steps:
Create a layout for your row view.
Create a “holder” class with fields to store child views of the row.
For each new inflated row, create a holder instance and assign its fields to the results of calling findViewById(int) for each child view.
Set the instance of the holder as the top-level view’s tag with setTag(Object).
Reuse (and cast) the holder object for reused row views.
I don’t like this pattern, for several reasons:
It puts too much responsibility in the Adapter’s getView(...) method.
The “holder” class is typically just boilerplate code and creating it/setting it up is a chore.
The view’s tag property requires casting to the correct holder type, which feels kludgy.
It violates encapsulation, since the adapter/holder has to know about the internals of the view representing each item in the list.
So, rather than complaining about it all the time, I’ll propose an alternative: subclassing!
Instead of creating a generic view, a holder class and an Adapter implementation that knows too much about how to wire them all together, we will use a subclass of RelativeLayout for the root view of our custom layout. I call this class ItemView. Item is the generic model object that represents data within our list using three properties: an image URL, a title and a description.
    public class Item {
        private String mImageUrl;
        private String mTitle;
        private String mDescription;
        // constructor, getters and setters elided
    }
ItemView is responsible for translating an Item into views to render onscreen. As a user of ItemView (in the Adapter subclass), I want my job to be as simple as possible. I really just need to do two things:
Create or reuse an instance of ItemView for a row.
Associate the current row’s Item with the ItemView.
You can see the API for this in action in the ItemAdapter class:
    public class ItemAdapter extends ArrayAdapter<Item> {
        public ItemAdapter(Context c, List<Item> items) {
            super(c, 0, items);
        }
        @Override
        public View getView(int position, View convertView, ViewGroup parent) {
            ItemView itemView = (ItemView)convertView;
            if (null == itemView)
                itemView = ItemView.inflate(parent);
            itemView.setItem(getItem(position));
            return itemView;
        }
    }
There are two interesting lines of code here: first, we call ItemView.inflate(ViewGroup), a static method, to return an instance of ItemView if we don’t have one to reuse. Then, we populate the view with the data for the current item using setItem(Item). All of the details of how this inflation and population happen are encapsulated within ItemView.
ItemView acts as its own “holder” by using member variables to store references to its significant child views.
    public class ItemView extends RelativeLayout {
        private TextView mTitleTextView;
        private TextView mDescriptionTextView;
        private ImageView mImageView;
        ...
    }
The inflate(ViewGroup) static method makes it simple to create a properly-configured ItemView in code while still taking advantage of an XML layout resource for easy configuration-based customization.
    public static ItemView inflate(ViewGroup parent) {
        ItemView itemView = (ItemView)LayoutInflater.from(parent.getContext())
                .inflate(R.layout.item_view, parent, false);
        return itemView;
    }
It uses the parent argument (in this case the ListView) to get a Context and inflate the R.layout.item_view layout resource, returning the root ItemView found there. If we look at the layout, we can see that it is just one element:
    <com.bignerdranch.android.listitemviewdemo.ItemView
        xmlns:android="http://schemas.android.com/apk/res/android"
        android:layout_width="match_parent"
        android:layout_height="wrap_content"
        android:padding="5dp" />
All we have in that file is an instance of ItemView with some basic padding specified. Note in particular that there are no child views here. Where are the ImageView and the two TextViews? To find them we have to look at the constructor for ItemView, where it inflates a secondary layout for its children.
    public ItemView(Context context, AttributeSet attrs, int defStyle) {
        super(context, attrs, defStyle);
        LayoutInflater.from(context).inflate(R.layout.item_view_children, this, true);
        setupChildren();
    }
This constructor will (eventually) be called during the process of inflating the layout containing the ItemView element. When that happens, we call through to the superclass constructor to take care of the standard attributes, and then we inflate R.layout.item_view_children to add the child views of interest to the current ItemView instance. This layout looks like this:
    <?xml version="1.0" encoding="utf-8"?>
    <merge
      xmlns:android="http://schemas.android.com/apk/res/android"
      android:layout_width="match_parent"
      android:layout_height="wrap_content" >
      <ImageView
        android:id="@+id/item_imageView"
        android:background="@android:color/darker_gray"
        android:layout_width="60dp"
        android:layout_height="60dp"
        android:layout_margin="5dp"
        android:contentDescription="@string/item_imageView_contentDescription"
        />
      <TextView
        android:id="@+id/item_titleTextView"
        android:layout_width="wrap_content"
        android:layout_height="wrap_content"
        android:layout_toRightOf="@id/item_imageView"
        android:text="title text"
        />
      <TextView
        android:id="@+id/item_descriptionTextView"
        android:layout_width="wrap_content"
        android:layout_height="wrap_content"
        android:layout_toRightOf="@id/item_imageView"
        android:layout_below="@id/item_titleTextView"
        android:layout_marginTop="5dp"
        android:text="description text"
        />
    </merge>
The root element is a merge tag, which means that during inflation, each of the children of that tag will be added as children of the parent argument passed to the inflate(...) method in the constructor. After that is done, we call our private setupChildren() method to wrap up the work of calling findViewById(int) and associating the child views with the appropriate member variables.
    private void setupChildren() {
        mTitleTextView = (TextView) findViewById(R.id.item_titleTextView);
        mDescriptionTextView = (TextView) findViewById(R.id.item_descriptionTextView);
        mImageView = (ImageView) findViewById(R.id.item_imageView);
    }
At this point, ItemView is capable of doing everything the “holder” class would typically do. It will cache these child-view references in its own member variables, and there is no need to use the “tag” for anything.
For convenience, we also provide the setItem(Item) method for callers to use to populate the child views with an Item’s data:
    public void setItem(Item item) {
        mTitleTextView.setText(item.getTitle());
        mDescriptionTextView.setText(item.getDescription());
        // TODO: set up image URL
    }
That’s about all there is to this pattern. While we had to create two layout files (instead of one) and a static convenience method for inflation, look at all the advantages we get for it:
The Adapter implementation is greatly simplified.
The ItemView can be created easily in code or in an XML layout file.
Any future customizations or configuration-specific changes to the layout of ItemView can be handled entirely within that class’ implementation and layout files.
There are no extra “holder” classes or objects created during the process.
The next time you find yourself reaching for the holder pattern, consider subclassing instead. The encapsulation it offers allows you to freely customize your list row view without your Adapter or other code having to worry about the details, and the performance should be equally as good as the holder pattern during view reuse.
If you want to see some examples of alternative ways to implement this functionality, check out Pavel Dudka’s post that was linked up in Android Weekly back in March. I enjoyed reading the discussion of the techniques presented there, but I feel the pattern shown here offers a nice marriage of less code, good performance and easy customization.
Introduction When computer programming was young, code was punched into cards. That is, holes were punched into a piece of cardboard in a format...

Jetpack Compose is a declarative framework for building native Android UI recommended by Google. To simplify and accelerate UI development, the framework turns the...

Big Nerd Ranch is chock-full of incredibly talented people. Today, we’re starting a series, Tell Our BNR Story, where folks within our industry share...