From Punched Cards to Prompts
AndroidIntroduction When computer programming was young, code was punched into cards. That is, holes were punched into a piece of cardboard in a format...
At Google I/O 2014, Google unveiled RecyclerView, a successor to ListView. RecyclerView sought to strip away much of the cruft that slowed down ListView, and in doing so, shipped without some of the conveniences we’d gotten used to. We’ve discussed how to responsibly add some of that functionality back in previous blog posts, and today we’ll continue with a look at list dividers.
One common task that isn’t as convenient in RecyclerView is the addition of dividers or offsets between list items, but you can fortunately create your own dividers with ItemDecoration.
RecyclerView.ItemDecoration is a tool used to decorate the children of a RecyclerView. RecyclerView is a ViewGroup, with each of its children representing an item in a list. With ItemDecoration you can easily modify the appearance of these child views.
For example, let’s add dividers to a RecyclerView using a LinearLayoutManager, oriented vertically. In order to do so, we’ll subclass ItemDecoration, giving our new class a constructor that takes in a divider to be drawn between list items.
public class DividerItemDecoration extends RecyclerView.ItemDecoration {

    private Drawable mDivider;

    public DividerItemDecoration(Drawable divider) {
        mDivider = divider;
    }
...
ItemDecoration features three methods for us to override, but we’ll only need two: getItemOffsets and onDraw.
First, getItemOffsets. We need to provide offsets between list items so that we’re not drawing dividers on top of our child views. getItemOffsets is called for each child of your RecyclerView.
@Override
public void getItemOffsets(Rect outRect, View view, RecyclerView parent, RecyclerView.State state) {
    super.getItemOffsets(outRect, view, parent, state);

    if (parent.getChildAdapterPosition(view) == 0) {
        return;
    }

    outRect.top = mDivider.getIntrinsicHeight();
}
In getItemOffsets, we’re changing the shape of the Rect outRect, which determines the amount of padding on each side of the the list item. By default, this padding is 0. Here, we change the top field of outRect to the height of our divider so that it has room to be drawn without overlapping any other views.
Note that we skip this action for the first item in the list so that we don’t draw an offset above the RecyclerView.
Next, in onDraw, we determine the bounds of our divider and draw it onto the RecyclerView. onDraw is called just once.
@Override
public void onDraw(Canvas canvas, RecyclerView parent, RecyclerView.State state) {
    int dividerLeft = parent.getPaddingLeft();
    int dividerRight = parent.getWidth() - parent.getPaddingRight();

    int childCount = parent.getChildCount();
    for (int i = 0; i < childCount - 1; i++) {
        View child = parent.getChildAt(i);

        RecyclerView.LayoutParams params = (RecyclerView.LayoutParams) child.getLayoutParams();

        int dividerTop = child.getBottom() + params.bottomMargin;
        int dividerBottom = dividerTop + mDivider.getIntrinsicHeight();

        mDivider.setBounds(dividerLeft, dividerTop, dividerRight, dividerBottom);
        mDivider.draw(canvas);
    }
}
We first calculate the left and right bounds of the parent RecyclerView, as they will be the left and right bounds of our divider between each child view. We then have to calculate the location of the top and bottom of each divider, as they’re unique for each child view.
Once we have these bounds calculated, we’re able to set the bounds of each divider and draw it on the screen.
Make sure your company is positioned for success with these mobile app tips!
Adding an ItemDecoration to your RecyclerView is fairly straightforward. Using the example above, get an instance of your new DividerItemDecoration, passing in the Drawable you’d like to use as a divider (in this case, dividerDrawable).
RecyclerView.ItemDecoration dividerItemDecoration = new DividerItemDecoration(dividerDrawable);
recyclerView.addItemDecoration(dividerItemDecoration);
You can even add multiple ItemDecorations to the same RecyclerView. They tend to play nicely, but they’ll draw on top of each other in the order in which they are added. You can change this drawing priority by passing in an index to your addItemDecoration call:
int decorPriorityIndex = 0;
recyclerView.addItemDecoration(dividerItemDecoration, decorPriorityIndex);
You can also remove an ItemDecoration at will:
recyclerView.removeItemDecoration(dividerItemDecoration);
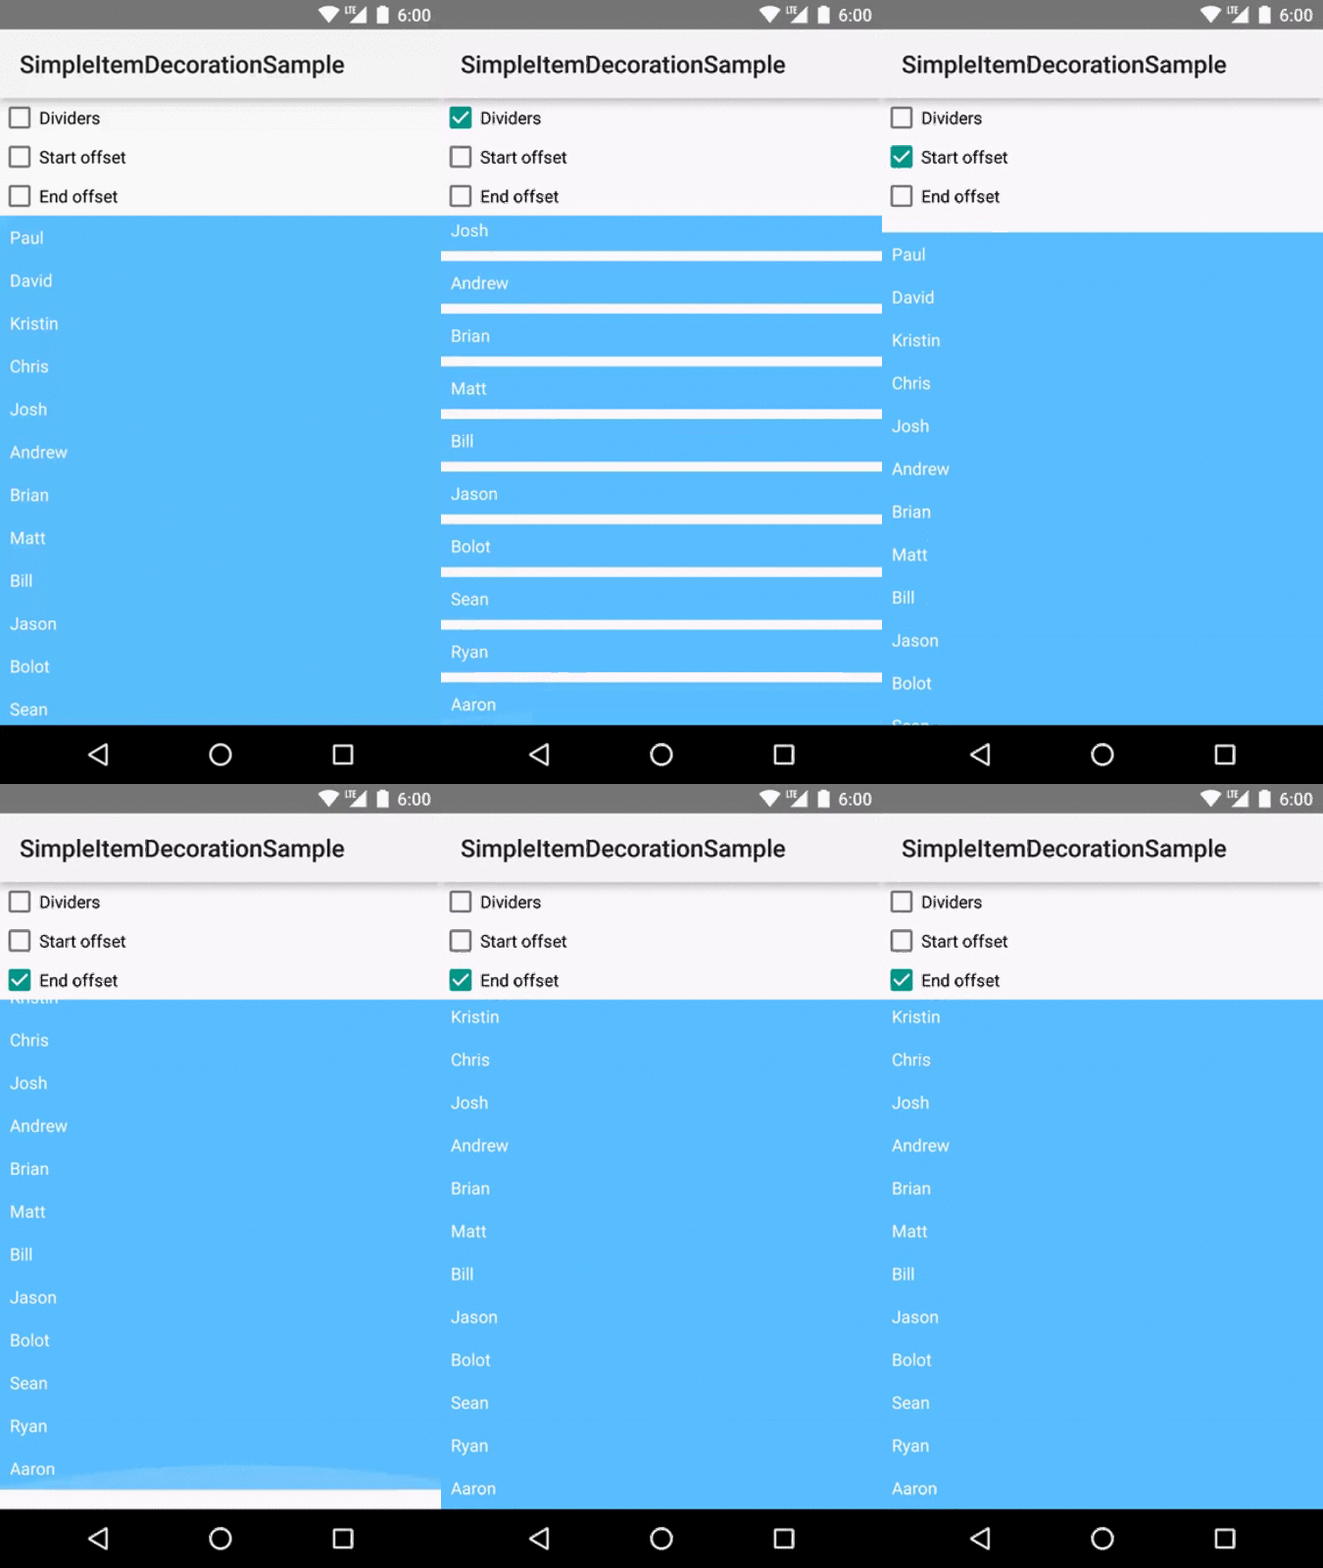
ItemDecorations are a quick, flexible way to customize your RecyclerView. I’ve provided six ItemDecoration implementations wrapped in a library that I’ve creatively named SimpleItemDecoration.

Let’s use SimpleItemDecoration to add a divider to a RecyclerView with a LinearLayoutManager.
Drawable dividerDrawable = ContextCompat.getDrawable(this, R.drawable.divider);

recyclerView.addItemDecoration(new DividerItemDecoration(dividerDrawable));
We get a reference to a divider to use as a Drawable and pass it to the constructor of our DividerItemDecoration. Then we simply attach the new DividerItemDecoration to our RecyclerView via RecyclerView#addItemDecoration.
If this looks eerily similar to the ItemDecoration example above, that’s because it is. The difference here is that you don’t have to supply the ItemDecoration implementations—I’ve taken care of that.
So far, I’ve written solutions for the following six ItemDecoration implementations:
Let me know if you think of other uses for ItemDecoration!

Introduction When computer programming was young, code was punched into cards. That is, holes were punched into a piece of cardboard in a format...

Jetpack Compose is a declarative framework for building native Android UI recommended by Google. To simplify and accelerate UI development, the framework turns the...

Big Nerd Ranch is chock-full of incredibly talented people. Today, we’re starting a series, Tell Our BNR Story, where folks within our industry share...
