

Swift Regex Deep Dive
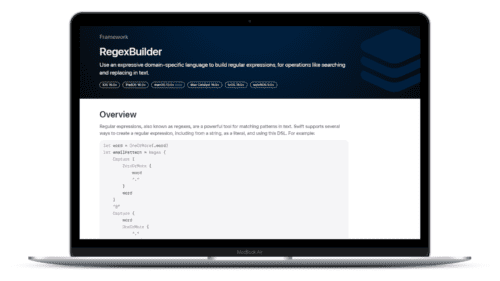
iOS MacOur introductory guide to Swift Regex. Learn regular expressions in Swift including RegexBuilder examples and strongly-typed captures.
To say this year has been massive for API and framework updates would be underselling WWDC 2019. Core ML has been no exception. So far with Core ML 2 we saw some amazing updates and that made on device training amazingly simple. However, there was still a lot to be desired and if you wanted to implement newer models like YOLO you needed to drop down to Metal and do a lot of leg work to get a model up and running.
Now we have Core ML 3 and honestly outside of optimization alone I’m not too sure why you would need to drop down to metal after this new update. Let’s get into the update on what changed with Core ML 3 that has enabled us to take our on device learning even further.
A quick look at Core ML 2 and you can see the limitation that would force you into writing your network in Metal. You only had acyclic graphs (one way through) and about 40 layer types. However many advanced architecture types have control flow like loops or branching statements. In comes Core ML 3. Now we have access to control flow, dynamic layers, new operators, and 100+ layer additions!
Apple showed off running Google’s ground breaking BERT neural network on device. Before this complex architecture would have had to be implemented directly in Metal. After taking a review of Core ML 3’s new features, short form developing a whole new way of machine learning processing I am not sure what architecture type could not run inside of Core ML 3. Of course this is an ever growing field, so there will be things in time, that will not run in Core ML 3. However, the amount of new layers is unexpected. CoreML went from easy basic machine learning models, to easily adding almost any production architecture type.
Best of all the Core ML Tools have stayed the same so you can easily export your models from Keras, Tensorflow, or PyTorch (via ONNX) in Core ML 3 the same way you do today.
When you throw a model onto your application it rarely runs alone. It is normally a part of a pipeline that might include multiple models or even just Apples higher level machine learning APIs. One common setup in these pipelines are called encoder-decoder patterns, where one neural network ends without a prediction but just a set of features, then another network plugs into those features to make the final prediction.
In Core ML 2 this encoder-decoder might be loaded into your app as one model. This coupling can be problematic. Let say you have a sign reader, the encoder doesn’t care about the language; it is only identifying a set of features. You then have a decoder for English signs, and one for German signs. You would have two models in your app that both have an identical shared encoder.
Now in Core ML 3 you can link to this shared encoder from your models. Thus you will have only one encoder and two decoders in your application. This is fantastic as the encoder in this example would most likely be much larger than the decoder.
Right now when you want to import a photo into a CNN you need to convert that photo, as well it’s helpful to scale the model. There are a few ways of doing this, however its a bit annoying as the Vision framework handles this for you automatically. However, now so does Core ML 3. With the new MLFeatureValue you don’t need to worry about this. You can pass in CGImage or even better URLs and let Core ML handle the rest for you.
We also have some new configuration settings. You can now pick where you model runs although I’m not sure when you would set this. If you do have a use case please comment below as I would love to know!
| Option | Neural Engine | GPU | CPU | Default |
|---|---|---|---|---|
| .all | ☑️️ | ☑️ | ☑️ | ☑️️ |
| .cpuAndGPU | ☑️ | ☑️️ | ||
| .cpu | ☑️️ |
We also got two more very useful configuration options:
perferredMetalDevice: MTLDevice: great when porting your app to macOS thanks to the Catalina’s build options, and giving the user the option of what GPU they want to use with your app consider they might have an eGPU plugged in.allowLowPrecisionAccumulationOnGPU: Bool: This enables calculating using Float 16 instead of Float 32 when doing on device update learning. Note while Float 16 is amazing in terms of helping with memory usage it typically is less accurate so make sure to check accuracy of your models before saving the update.We finally have it; Core ML 3 brings on device learning to your apps. This is part of Apple’s push to keep user data private. We will go into it more in other blog post. However Apple wants to push for private federated learning. This is where you have your trained model. Push it to a user, over time that model can learn from the user and become personalized. The changes to this model can be uploaded to your servers, aggregated with other users and a new model can be produced, all without user data leaving their phones!
This potentially saves your company many headaches of scalability of your models and privacy issues that arise from needing user data to keep your model’s improving over time. This also has large implications for models in parts of the world or country that have poor reception and uploading photos or other user data isn’t practical.
With this change we do have a new Core ML model structure
| Core ML 2 | Core ML 3 |
|---|---|
| Prediction Interface | Prediction Interface |
| Update Interface | |
| Metadata | Metadata |
| Model Parameters | Model Parameters |
| Update Parameters |
Unfortunately you can’t perform on device training for everything in Core ML 3. You can do on device training for Nearest Neighbor Classifiers, Neural Networks, and Pipeline Models.
As for Neural Networks the following can be updated.
| Layers | Losses | Optimizers |
|---|---|---|
| Convolution | Categorical Cross Entropy | Stochastic Gradient Decent |
| Fully Connected | Mean Squared Error | Adam |
| can back propagate through many more |
While you might not be able to update your LSTM models just yet this is very impressive and will provide a lot of models useful on device updates. One of the main things here as well. While you can’t update some layer types you can still back propagate though them so if your convolution layers sit after some non-updatable layer you can still get to your convolution layer to update.
While your model will use some configured parameters for training you this can be set at runtime if you have some A/B testing or update you would like the model to use. Using the MLModelConfiguration.updateParameters: [MLParameterKey : Any you can set the following parameters for your training run.
Lets take a quick look at the API to update a model:
// Training input
class StickerClassifierTrainingInput : MLFeatureProvider {
	// Example sketch image as grayscale image buffer, 28x28 pixels
	var sketch: CVPixelBuffer

	// True sticker corresponding with the sketch as a string
	var sticker: String
}

// 1. Get updatable model URL
let bundle = Bundle(for: StickerClassifier.self)
let updatableModelURL = bundle.url(forResource: "StickerClassifier", withExtension: "mlmodlec")!

// 2. Prepare training data
let trainingData = prepareTrainingData(from: trainingSamples)

// 3. Kick off update task
let updateTask = try MLUpdateTask(
						forModelAt: updatableModelURL,
						trainingData: trainingData,
						configuration: configuration,									'
						completionHandler: {
							context in
							// Use update model for predictions
							self.stickerClassifier.model = context.model
							// Write the model for later use
							context.model.write(to: updatedModelURL)
						})
updateTask.resume()
Best of all when training you might want to handle events or log things as they happen. We have that with MLUpdateProgresshandler. This way you can be alerted for events like training began or when each epoch comes to an end.
let handlers = try MLUpdateProgressHandlers(forEvents: [.trainingBegan, .epochEnd],
												progressHandler: {
													context in
													computeAccuracy(forModel: context.model)
												},
												completionHandler: completionHandler)
let updateTask = try MLUpdateTask(forModelAt: updatableModelURL,
									trainingData: trainingData,
									configuration, configuration,
									progressHandlers: handlers)
With Apple’s new BackgroundTask Framework you can (and should unless you need instant learning) be training in the background. Preferably at night when the device is charging. You can start a background task that will last several minutes, making this a great fit for background ML update training.
Finally, we can easily get a model that is updatable with a simple change to our converter code.
convert(…, respect_trainable=true)
If you have been trying to decide on Core ML vs TensorFlow Light for your iOS needs this could be your deciding factor in the fight for on device machine learning.
This WWDC has been full of amazing announcements empowering developers to build brilliance for their customers. On the side of machine learning this is no different. Apple has taking Core ML further in a year then I was expecting them to over the next couple of years. You can expect much more in terms of Core ML breakdown on the blog but for now we will leave you to explore Core ML 3 in your apps.
Our introductory guide to Swift Regex. Learn regular expressions in Swift including RegexBuilder examples and strongly-typed captures.
The Combine framework in Swift is a powerful declarative API for the asynchronous processing of values over time. It takes full advantage of Swift...

SwiftUI has changed a great many things about how developers create applications for iOS, and not just in the way we lay out our...