

Swift Regex Deep Dive
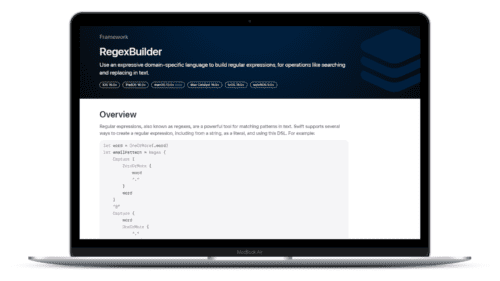
iOS MacOur introductory guide to Swift Regex. Learn regular expressions in Swift including RegexBuilder examples and strongly-typed captures.
In the early days of Apple, disk space was a precious and limited resource. With today’s modern iOS and macOS devices, disk space is relatively abundant, but developers still need to be careful about how they manage their application data. iPhone and iPad users can quickly find their relatively large solid-state drives filling up with media or apps.
If you’re developing an app for iOS or macOS you may find yourself storing a variety of custom data on the user’s device including: application support files, temporary data, cached images, etc. In some cases it may make sense for you to compress this data yourself to reduce the required storage space. Although many compression algorithms can be complex to implement from scratch, thankfully Apple has made it easy with their Compression framework.
Available in iOS 9.0+ and macOS 10.11+, Compression simplifies the process of leveraging a number of common compression algorithms such as ZLIB, LZMA, LZFSE, and LZ4.
There are a wide variety of compression algorithms available. In general, they reduce the size of data by identifying repetition and creating a new intermediary data representation which eliminates this ‘waste of space.’ There are two broad categories of algorithms: lossy and lossless—the key difference being that lossy algorithms actually result in a loss of the input data, meaning the exact input data can’t necessarily be restored in full after decompression. JPEG compression is a classic example of a lossy algorithm, and if you’ve ever seen an internet image that was full of artifacts, you’ve witnessed the result of this data loss.
For most computing applications, lossless algorithms are necessary to ensure data integrity, so that is what we’ll be using here. (All of the compression algorithms offered by Apple’s Compression framework are lossless.)
In this post we’ll be using ZLIB (which internally is built around DEFLATE), as it is a commonly-used algorithm for general data compression and has widespread cross-platform support. If you’re not as concerned with platform compatibility you may consider a different algorithm. Apple provides brief descriptions of the available algorithms and when to use them in the Compression.Algorithm enumeration docs.
Now let’s take a closer look at how you can easily and quickly reduce the size of stored data. Let’s imagine we’re working on an iOS or macOS app that needs to save a large JSON payload to disk. And although we’re focusing on local storage here, compression is also an important consideration for network requests and bandwidth usage. JSON typically contains a considerable amount of repetition, so we can expect significant size savings by compressing the data before we save it to disk.
To start, we’ll get an actual Data object from our JSON string. Note: the JSON itself is omitted below, but you can use any example JSON string to quickly test this code out. We’ll also grab the input data size while we’re at it, as we’ll want to reference it later.
let jsonString: String = …
guard let inputData = jsonString.data(using: .utf8) else { /* Handle error */ }
let inputDataSize = inputData.count
Now we create a buffer used to store the compressed data. We allocate it with a reasonable starting size based on the inputData. We’re using Swift’s UnsafeMutablePointer here to effectively give us a raw block of memory, which is represented as a series of UInt8s.
Because allocate<T>(capacity: N) allocates as many bytes as needed for N instances of type <T>, we want to make sure to accommodate the size of that data type by checking the MemoryLayout for UInt8. However, in practice, it’s extremely unlikely that a UInt8 would ever require anything besides a single byte (which means the size and stride would be 1), so this is mostly in place as a safeguard.
let byteSize = MemoryLayout<UInt8>.stride
let bufferSize = inputDataSize / byteSize
let destinationBuffer = UnsafeMutablePointer<UInt8>.allocate(capacity: bufferSize)
We’ll also create a source buffer which contains our inputData. There are various ways to do this in Swift (and also avoiding copying the data), though for our purposes the approach below provides simple and readable code:
var sourceBuffer = Array<UInt8>(repeating: 0, count: bufferSize)
inputData.copyBytes(to: &sourceBuffer, count: inputDataSize)
Now the fun part: compressing the data. Apple has made this as simple as possible: we just pass our buffers into the compression_encode_buffer() function along with the sizes and the algorithm we’d like to use (in this case COMPRESSION_ZLIB).
let compressedSize = compression_encode_buffer(destinationBuffer,
                                                inputDataSize,
                                                &sourceBuffer,
                                                inputDataSize,
                                                nil,
                                                COMPRESSION_ZLIB)
For fun, you might try comparing the values now of inputDataSize vs compressedSize. It’s not uncommon for ZLIB to achieve JSON compression rates of 70% or higher.
The result of the function call will be the size of the data once it’s compressed. The actual compressed data is now in our destinationBuffer. We can check for a return size of 0 to determine if any errors occurred, otherwise we can now make use of the buffer data. One way to do this is to take ownership of the memory using NSData.bytesNoCopy() as shown below and toll-free bridge it to Data.
guard compressedSize != 0 else { … }
let encodedData: Data = NSData(bytesNoCopy: destinationBuffer, length: compressedSize) as Data
It’s worth noting that using this approach causes our Data to take ownership of the allocated bytes of the buffer, and puts that memory under the standard Swift memory management rules we’re familiar with for Foundation objects. This means that you do not need to (and should not) manually deallocate the buffer memory at this stage.
Our compressed data wouldn’t be very valuable if we couldn’t later restore it to its original form. Thankfully it’s quite simple—and is essentially just the above steps in reverse. The one difference is that we need to know the decompressed (original) size of the data so that we can allocate sufficient space. To perform the decompression we simply pass in the compressed data in a buffer, along with the original data size:
let decodedSize = compression_decode_buffer(destinationBuffer,
                                            inputDataSize,
                                            &sourceBuffer,
                                            compressedSize,
                                            nil,
                                            COMPRESSION_ZLIB)
Compression can be a valuable tool in your developer tool chest to ensure that your iOS and macOS applications are good citizens and are not wasting disk space or network bandwidth. Apple’s Compression framework makes it easier than ever to use common compression algorithms in your apps.
Our introductory guide to Swift Regex. Learn regular expressions in Swift including RegexBuilder examples and strongly-typed captures.
The Combine framework in Swift is a powerful declarative API for the asynchronous processing of values over time. It takes full advantage of Swift...
SwiftUI has changed a great many things about how developers create applications for iOS, and not just in the way we lay out our...