

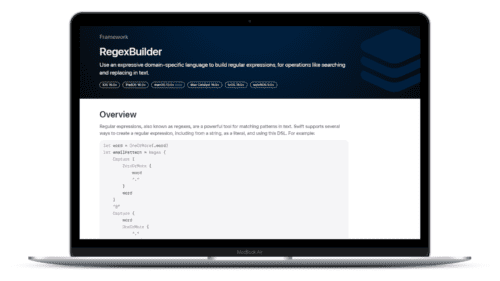
Swift Regex Deep Dive
iOS MacOur introductory guide to Swift Regex. Learn regular expressions in Swift including RegexBuilder examples and strongly-typed captures.
On iOS projects, we often find ourselves using command-line tools for testing and distributing our apps. More often than not, these tools were written in Ruby.
Ensuring we, as a team, are all running the same version of these tools is an important step in keeping our configurations consistent. We also want to ensure our continuous integration builds are using the exact same versions. Finally, our engineers often need to move between different code bases without being blocked by the tools. At the Ranch, we can be found working on a combination of consulting projects, open-source projects or course materials (such as our iOS development course). Thorough code review and pair programming with our peers further increase our need to move unencumbered between projects.
In this post, we will start from the top with Ruby, work our way down to the command-line tools themselves and wrap up with a little bit of automation magic!
Just like any other programming language, there are different versions of Ruby. We can see which version of Ruby shipped with our operating system (assuming you’re on a Mac) by typing into our terminal:
$ /usr/bin/ruby --version
My output on macOS Sierra 10.12.6 is:
Ruby 2.0.0p648 (2015-12-16 revision 53162) [universal.x86_64-darwin16]
If we relied on the system installed version of Ruby, there would be no guarantee everyone on the team has the same version. This is our first step in the chain to ensuring everyone is in sync.
There are a number of tools dedicated to managing versions of Ruby. Our personal favorite is a lightweight tool called rbenv, which allows us to install multiple different versions of Ruby on our system. Even more importantly for our purposes, rbenv allows us to configure a specific version of Ruby for a given directory.
The preferred way for installing rbenv on your computer is via Homebrew. Homebrew is a tool for compiling and installing software packages on macOS machines. You can think of this as being similar to downloading an app and installing it, except these programs are compiled directly from source on your machine.
rbenv will pick up on your project’s specific version of Ruby simply by looking for a version in a file named .ruby-version within our project’s root directory. The only thing this file needs is a Ruby version such as: 2.2.5.
Now when any team member moves into this directory, rbenv will know to use version 2.2.5. If this person has not installed that version of Ruby on their system, they will see the following error and step to remedy the problem:
rbenv: version `2.2.5' is not installed (set by ~/workspace/project/.ruby-version)

`rbenv install 2.2.5`
Adding a new version of Ruby is now a trivial task with the rbenv install command.
Now that everyone on the team is running the same version of Ruby, we need to make sure our tools are the same version. In Ruby libraries and tools are packaged up as gems.
Each team member could install tools like fastlane or cocoapods just by executing gem install toolname. However, we want to keep everyone locked on the same version. Luckily this is a solved problem in the Ruby community.
Enter Bundler. Bundler is itself a Ruby gem that allows you to specify all your project’s gems, and their version, in a file within your project’s root directory. This file is aptly named a Gemfile. For example the contents of CoreDataStack’s Gemfile are:
source "https://Rubygems.org"

gem 'fastlane'
gem 'jazzy'
gem 'cocoapods'
Since Ruby Gems are tied to a specific version of Ruby, you may see that Bundler has not been installed for the version of Ruby that your project specified earlier. That error would look like this:
rbenv: bundle: command not found

The `bundle' command exists in these Ruby versions:
  2.3.1
  2.4.0
  2.4.1
This can easily be fixed by executing gem install bundler. After you have installed Bundler and created your Gemfile, Bundler will go out and fetch the gems when you execute bundle install. If you are the first person on the team to set up the Gemfile this command will also create a Gemfile.lock.
The lock file maintains the exact version of each gem and is used to install those exact versions on each team member’s machine. These files should be added to your project’s version control so that new team members will get the exact same version of the tools you have installed.
Fetching newer versions of your Gems is quite easy. Just execute bundle update.
Now that everyone has their tools’ versions in lock-step, we invoke the tools with the prefix bundle exec. This command ensures that in the event your tool was also installed at a global level, we are still using our project’s specific version of the tool.
The hardest part of getting everyone on your team on the same page is getting everyone to install the tools above. It is admittedly a complex and time-consuming process. The folks at ThoughtBot also found this process tedious and created a script called laptop that installs everything mentioned above and a lot more.
A couple of us at Big Nerd Ranch, inspired by this script, created our own stripped-down version that installs the bare minimum tools an iOS developer needs. The macOS-bootstrap script is a convenient way to get a base setup for productive iOS and macOS development. There are even hooks for installing all types of extra software for each person’s choosing.
Now that you have a solid understanding of each step in the Ruby toolchain you can confidently set up a consistent environment for your development team. You will also be able to solve some of the common pain points others may experience along the way.
And if you want more help in creating iOS projects, join us for a bootcamp! Our iOS bootcamps are created for both intermediate and advanced developers, and are taught at locations in both Georgia and California.
Our introductory guide to Swift Regex. Learn regular expressions in Swift including RegexBuilder examples and strongly-typed captures.
The Combine framework in Swift is a powerful declarative API for the asynchronous processing of values over time. It takes full advantage of Swift...

SwiftUI has changed a great many things about how developers create applications for iOS, and not just in the way we lay out our...