From Punched Cards to Prompts
AndroidIntroduction When computer programming was young, code was punched into cards. That is, holes were punched into a piece of cardboard in a format...
It has always been possible to use Kotlin on the server.
Numerous Java server frameworks happily run any JVM bytecode, whether the code was originally written in Java, Kotlin, Scala or even JRuby.
But if you are an Android developer who wants to build simple JSON APIs for your apps, why not use a framework that was written in Kotlin by people who brought you Kotlin?
In this post, you will learn how to write a simple server application in Kotlin using Ktor.
You can check out our project on GitHub or build it from scratch by following the instructions below.
To develop server apps, download IntelliJ IDEA, the Community edition.
It should look familiar to Android developers, since Android Studio is based on it.
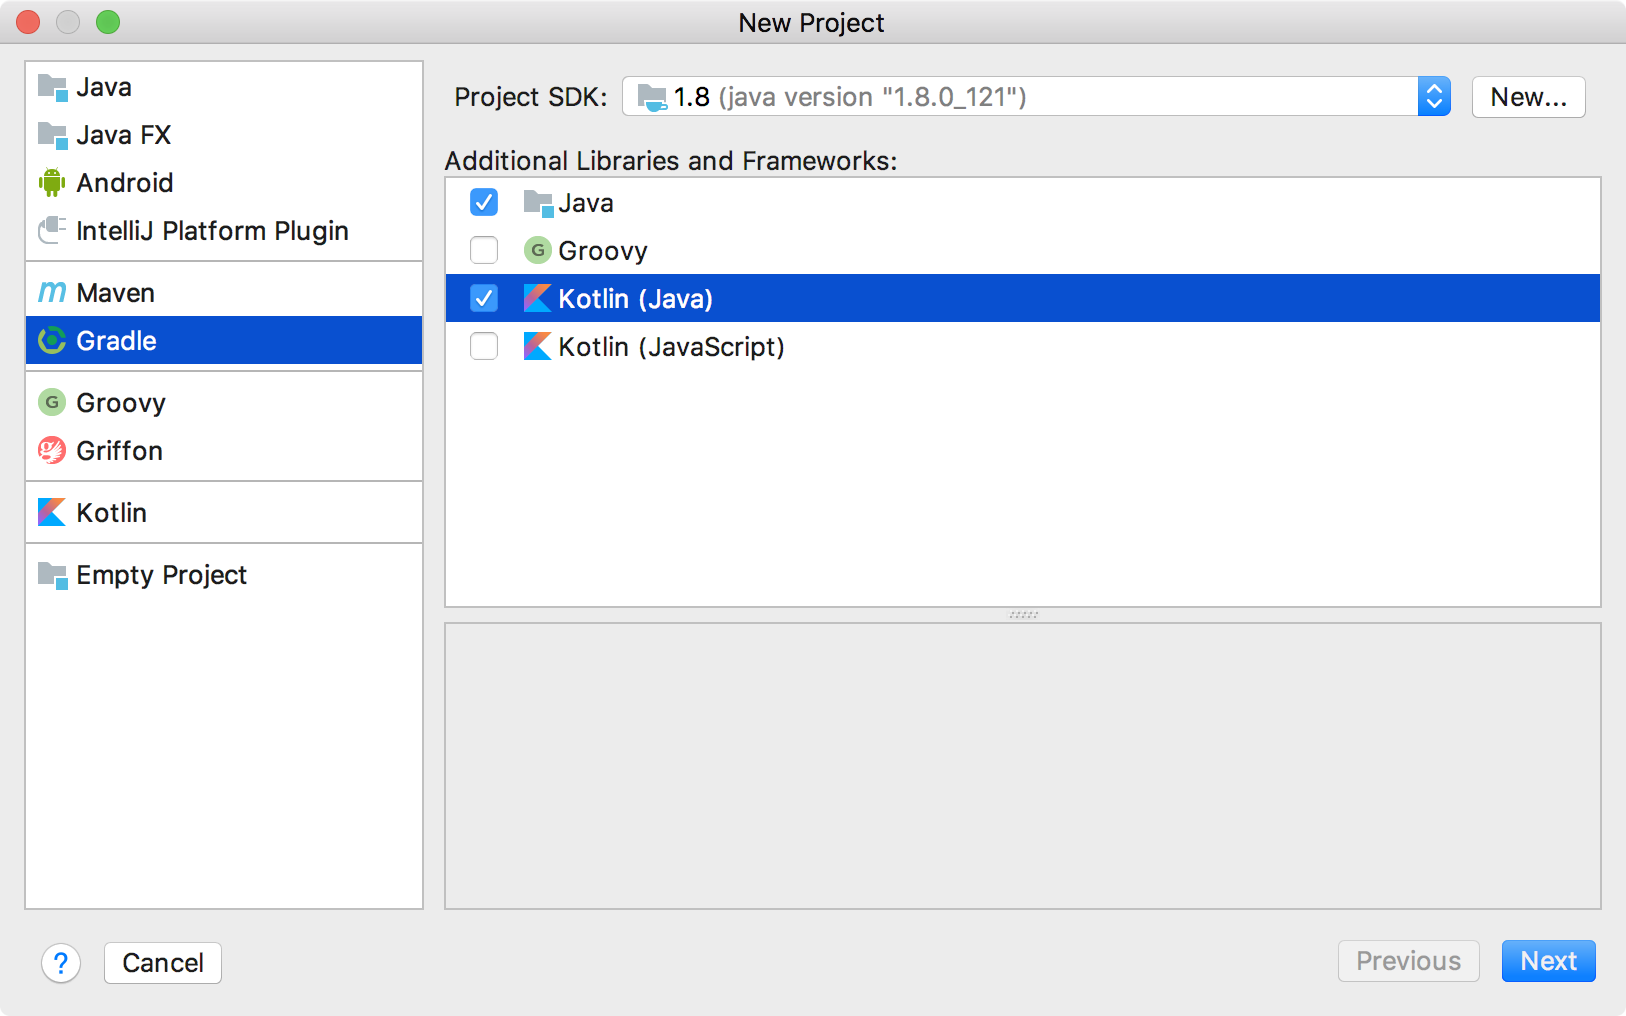
Create a new project (File > New Project…), then:

At this point, you may want to create a git repository and add a .gitignore file.
You can use the same one you use for your Android Studio projects.
Open build.gradle and add Ktor dependencies.
Add repositories where Ktor components are hosted:
repositories {
    mavenCentral()
+   maven { url "https://dl.bintray.com/kotlin/ktor" }
+   maven { url "https://dl.bintray.com/kotlin/kotlinx" }
}
Define the ktor_version variable:
buildscript {
    ext.kotlin_version = '1.1.3-2'
+   ext.ktor_version = '0.4.0-alpha-11'
Add the dependencies to the top-level dependencies, not the one in buildscript:
dependencies {
    compile "org.jetbrains.kotlin:kotlin-stdlib-jre8:$kotlin_version"
    testCompile group: 'junit', name: 'junit', version: '4.12'
+   compile "org.jetbrains.ktor:ktor-core:$ktor_version"
+   compile "org.jetbrains.ktor:ktor-netty:$ktor_version"
}
The ktor-core dependency contains the main Ktor API.
The ktor-netty is one of the hosts that can run Ktor applications.
Create a new file in src/main/resources and call it application.conf.
This file will allow you to configure the server parameters, such as the port number, environment, etc.
Copy the following configuration into application.conf:
ktor {
    deployment {
        port = ${PORT}
    }

    application {
        modules = [ WhoKt.main ]
    }
}
This file defines important parameters that the server will use: the port number to listen to connections and the module to load.
While you could hardcode the port number, using the environment variable ${PORT} will make your configuration more flexible and will prepare you for deployment to Heroku later.
Next, create a new Kotlin file, call it Who.
IntelliJ will add the kt extension, so it will show up as Who.kt in the project.
Unlike Java, Kotlin allows you to put any code in this file, not just the class that matches the filename.
Write the following code:
fun Application.main() {
    install(DefaultHeaders)
    install(CallLogging)
    install(Routing) {
        get("/") {
            val text = "Howdy, Planet!"
            call.respondText(text)
        }
    }
}
IntelliJ will ask you to import classes and functions as you go.
All of the imports should be in org.jetbrains.ktor packages:
import org.jetbrains.ktor.application.Application
import org.jetbrains.ktor.application.install
import org.jetbrains.ktor.features.DefaultHeaders
import org.jetbrains.ktor.http.ContentType
import org.jetbrains.ktor.logging.CallLogging
import org.jetbrains.ktor.response.respondText
import org.jetbrains.ktor.routing.Routing
import org.jetbrains.ktor.routing.get
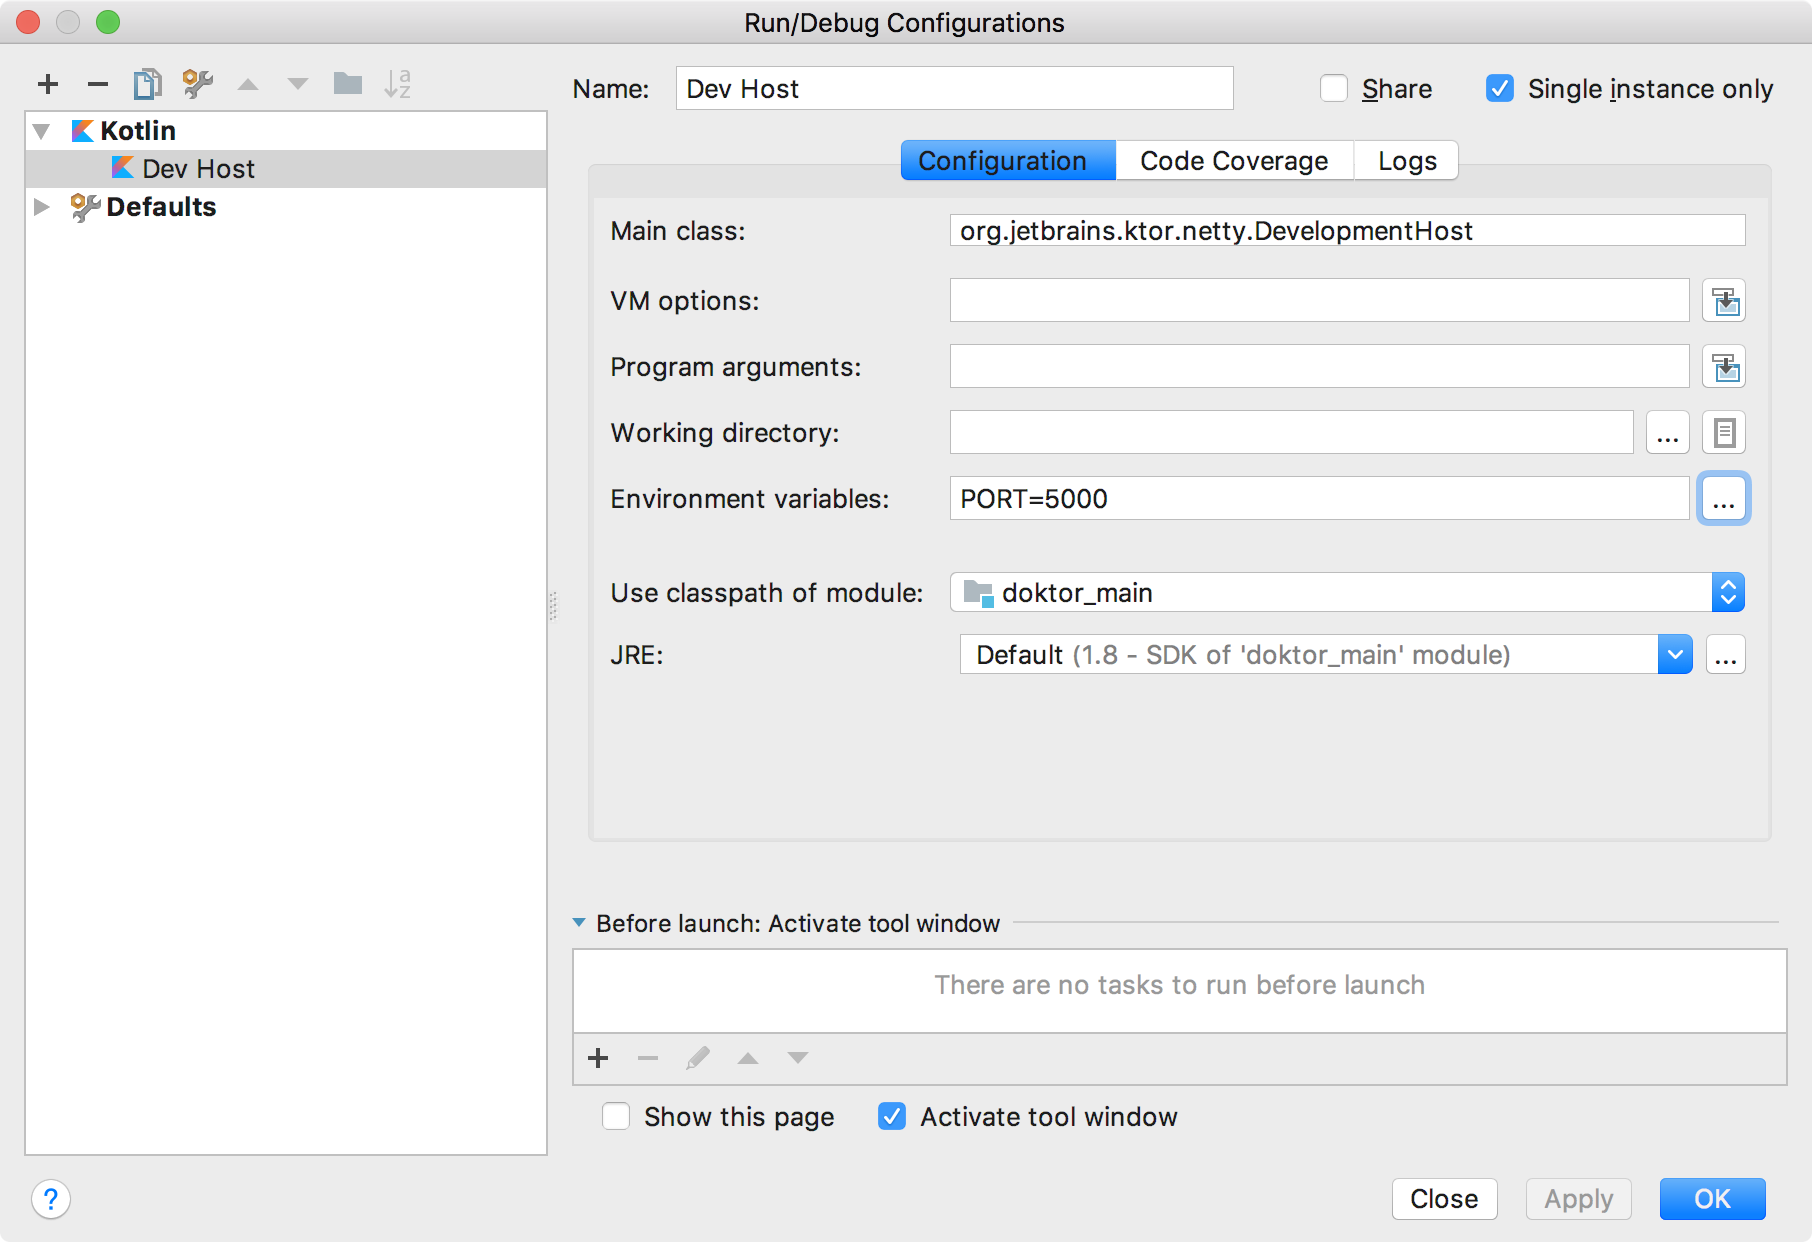
To run the server, you have to create a new run configuration.
Dev Hostorg.jetbrains.ktor.netty.DevelopmentHost... button next to the Environment variables field and add the variable called PORT with the value 5000doktor_mainYour run configuration should look like this:

Once you save the configuration, it will be preselected in the run configurations drop down.
Run the server by clicking the green “Play” button:

You can test the server from the terminal using curl.
Type this command:
curl -v -w "n" http://localhost:5000/
The -v option is short for --verbose and allows you to see more details of the request and response, such as headers.
The -w option stands for --write-out and in this case allows you to force a new line after the response.
This is useful in bash, since it won’t automatically start the prompt on a new line.
You should see output that looks like this:
*   Trying ::1...
* TCP_NODELAY set
* Connected to localhost (::1) port 5000 (#0)
> GET / HTTP/1.1
> Host: localhost:5000
> User-Agent: curl/7.51.0
> Accept: */*
>
< HTTP/1.1 200 OK
< Date: Tue, 25 Jul 2017 19:32:18 GMT
< Server: ktor-core/0.4.0-alpha-10 ktor-core/0.4.0-alpha-10
< Content-Type: text/plain
< Content-Length: 14
<
* Curl_http_done: called premature == 0
* Connection #0 to host localhost left intact
Howdy, Planet!
If you are building your own API, you will most likely want to return JSON.
Building stringified JSON is no fun.
It’s much better to let a library do the heavy lifting.
So, add Gson to build.gradle:
    compile "org.jetbrains.ktor:ktor-core:$ktor_version"
    compile "org.jetbrains.ktor:ktor-netty:$ktor_version"
+   compile "com.google.code.gson:gson:2.8.1"
}
Back in Who.kt, create a data class:
data class Who(val name: String, val planet: String)
Data classes are a little bit like POJOs (Plain Old Java Objects), but with a lot of added power are more like Powerful Old Kotlin Expression for Minimal Object Notation.
You define the fields, the compiler generates accessors and several other functions, such as equals(), hashCode(), etc.
They even support destructuring declarations, so you can assign individual fields to separate variables, for example:
val (name, planet) = Who("Doktor", "Gallifrey")
Next, update the get("/") route:
    get("/") {
+       val doktor = Who("Doktor", "Gallifrey")
+       val gson = Gson()
+       val json = gson.toJson(doktor)
+       call.respondText(json, ContentType.Application.Json)
-       val text = "Howdy, Planet!"
-       call.respondText(text)
    }
To propagate these changes to the running instance of the server, you have to rebuild and restart the project.
You can rebuild the project by either using the keyboard shortcut ⌘F9 (Command-F9 on Mac or CTRL-F9 on Windows/Linux) or clicking the button in the toolbar to the left of the run configurations dropdown.
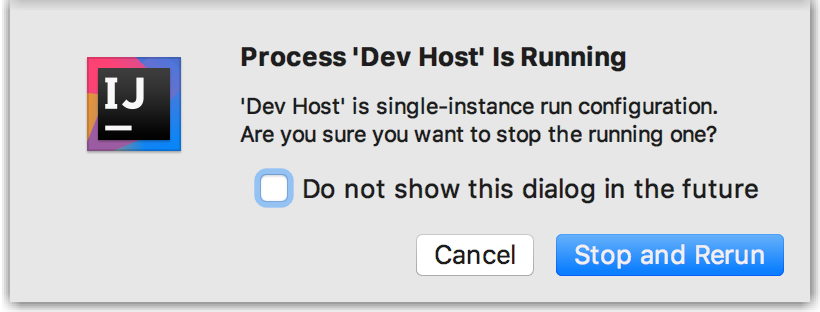
Since you configured “Dev Host” to be a single instance, the “Run” button is now a restart button.
The first time you use it, IntelliJ will ask you if you are sure you want to restart the server:

Test from the command line or your browser.
You should see the following JSON now:
{"name":"Doktor","planet":"Gallifrey"}
One more thing.
If you decide to access your server from an Android emulator, remember that localhost means connect to the current machine, i.e., the emulator itself.
To connect to the host computer, use the 10.0.2.2 IP address.
If you want to start the server from the command line, you have to let Gradle know how to run.
In your build.gradle file, add the application plugin and specify the main class.
 apply plugin: 'java'
 apply plugin: 'kotlin'
+apply plugin: 'application'

+mainClassName = 'org.jetbrains.ktor.netty.DevelopmentHost'
This is the equivalent of the run configuration you created in the IDE earlier.
To run the server, open the terminal and go to the root directory of the project, where the gradlew file is located, and execute ./gradlew run.
If you decide to make your Ktor application available to the world, then Heroku can help.
Heroku is a popular cloud platform that allows you to deploy various server applications.
Heroku supports applications that are built using Gradle, so deploying this app will be fairly straightforward.
Install Heroku command-line tools.
On a Mac, you can use Homebrew (or follow instructions for other platforms):
brew install heroku
Login to Heroku:
heroku login
You can create the app in your Heroku account or you can do that through the command line:
heroku create # only if you didn't create it on the web
If you did create the app in the Heroku account on the web, you can add the corresponding app’s remote:
heroku git:remote -a NAME_OF_YOUR_APP # if you created the app already
Change the default Gradle task that will be executed when you push the code to Heroku:
heroku config:set GRADLE_TASK="build"
Since Heroku does not know how to start Ktor apps, you have to create a custom Procfile.
Create the file in the root of your project and call it literally Procfile.
It will contain just a single line:
web: ./gradlew run
To test the app locally:
heroku local
Open http://localhost:5000/ in your browser.
You should see the familiar JSON again.
When you are ready to deploy, make sure all your files are committed to git and push your changes to Heroku:
git push heroku master
This post merely scratches the surface of what can be done with Ktor.
Let us know if you find this interesting and would like to see more Kotlin on the server content.

Introduction When computer programming was young, code was punched into cards. That is, holes were punched into a piece of cardboard in a format...

Jetpack Compose is a declarative framework for building native Android UI recommended by Google. To simplify and accelerate UI development, the framework turns the...

Big Nerd Ranch is chock-full of incredibly talented people. Today, we’re starting a series, Tell Our BNR Story, where folks within our industry share...