
How to Effectively Manage Your Client-Partner Relationships
Clients Project StrategyClients leave when they feel that their needs aren’t being met. The strength of your client-partner relationship relies on a deep understanding of your client’s...

Editor’s note: This is the third in a series of posts about developing Alexa skills. Read the rest of the posts in this series to learn how to build and deploy an Alexa skill.
Now that we have tested the model for our Airport Info Alexa Skill and verified that the skill service behaves as expected, it’s time to move from the local development environment to staging, where we’ll be able to test the skill in the simulator and on an Alexa-enabled device.
To deploy our Alexa skill to the staging environment, we first need to register the skill with the skill interface, then configure the skill interface’s interaction model. We’ll also need to configure an AWS Lambda instance that will run the skill service we developed locally.
The Alexa skill interface is what’s responsible for resolving utterances (words a user spoke) to intents (events our skill service receives) so that Alexa can correctly respond to what a user has asked. For example, when we ask our Airport Info skill to give status information for the airport code of Atlanta, Georgia (ATL), the skill interface determines that the AirportInfo intent matches the words that were spoken aloud, and that ATL is the airport code a user would like information about.
Here’s what the journey from a user’s spoken words to Alexa’s response looks like:
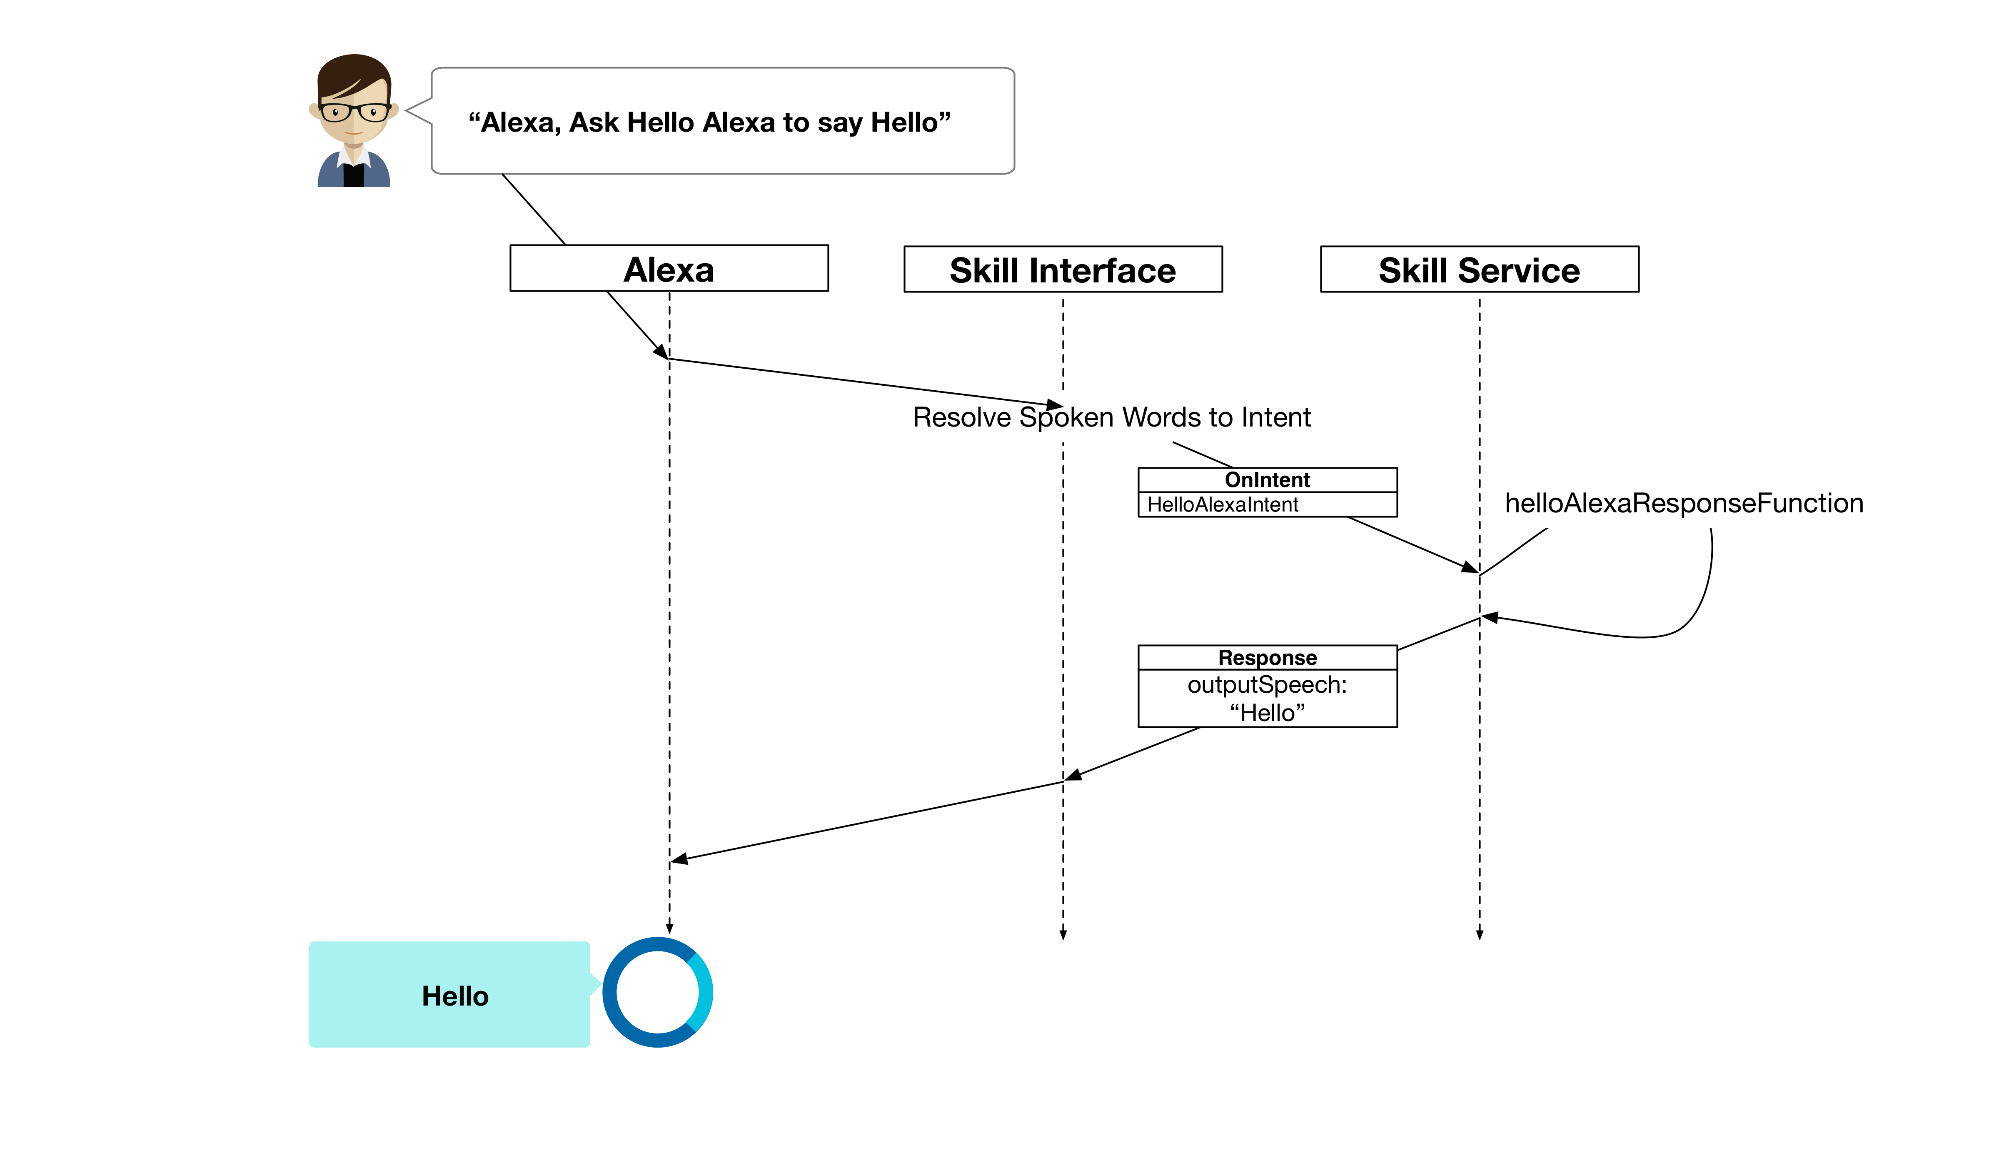
In our post on implementing Alexa intents, we simulated the skill interface with alexa-app-server so that we could test our skill locally. We sent a mock event to the skill service from alexa-app-server by selecting IntentRequest with an intent value of airportInfo and an AIRPORTCODE of ATL in the Alexa Tester interface.
By comparison, in a deployed skill, the skill interface lives on Amazon’s servers and works with users’ utterances that are sent from Alexa to the skill service.
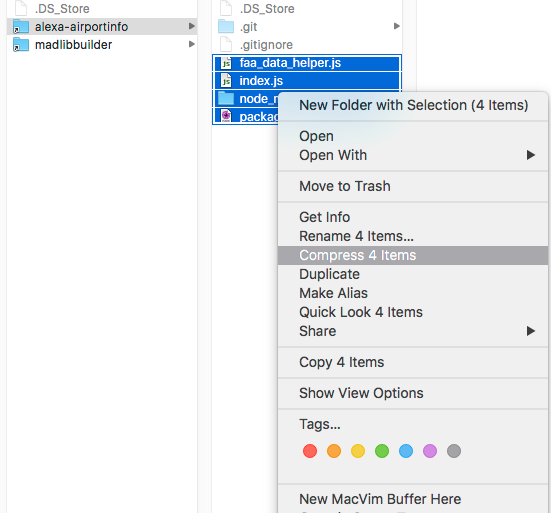
The first step in deploying our Alexa skill to staging is getting the skill service uploaded to AWS Lambda, a compute service that runs the code on our behalf using AWS infrastructure. AWS Lambda will accept a zipped archive of the skill service, so let’s create that now. Go to the AirportInfo directory we created in the last post and zip everything within the AirportInfo folder.
Log into AWS Lambda. You must be logged in on US-East (N. Virginia) in order to access the Alexa Service from AWS Lambda. To switch your location, simply click the location displayed next to your name in the top right of the AWS Console.
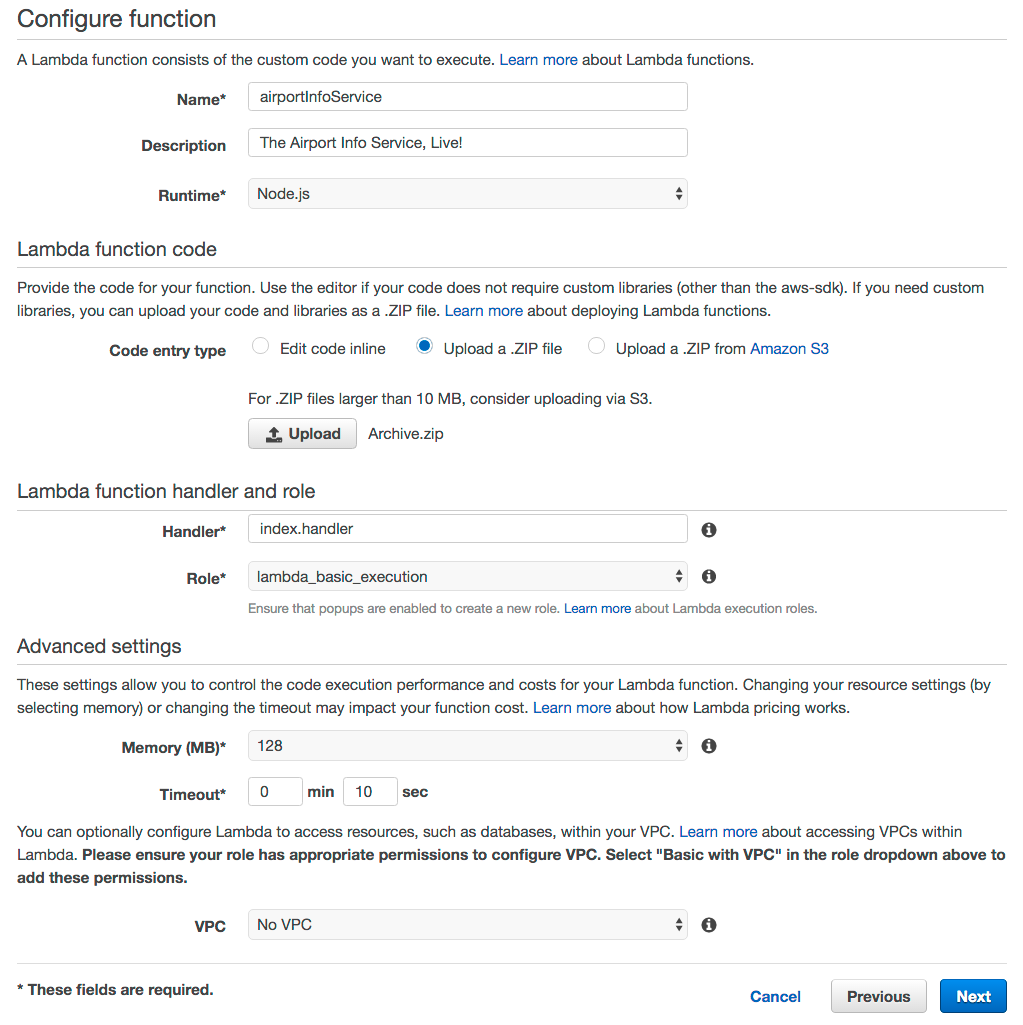
Click “Create a Lambda Function”. On the screen about selecting a blueprint, click “skip”. Now we can configure the Lambda function that will host our skill service by filling out the empty fields here:
Finally, select “upload a ZIP file” under “Lambda function code” and choose the archive file you created. You should wind up with a completed form that looks like this:
Click “Next”, and then click “Create function”. This takes us to a screen where will configure one last detail: the event source.
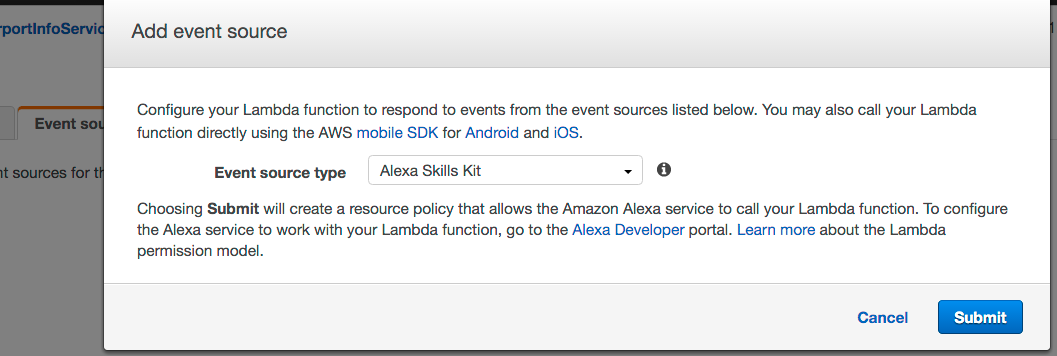
Click on the “Event source” tab and click “Add event source”. Select “Alexa Skills Kit” for the Event Source Type and click “Submit”.
Make sure to copy the “ARN” at the top right of the page. This is the Amazon Resource Name, and the skill interface we’re going to configure next needs that value to know where to send events. The ARN will look something like arn:aws:lambda:us-east-1:333333289684:function:myFunction.
We can test that the Lambda function works correctly by sending it a test event within the Lambda interface. Click the blue “Test” button at the right of the screen, and under “Sample Event Template” select “Alexa Start Session”. Click “Save and Test”.
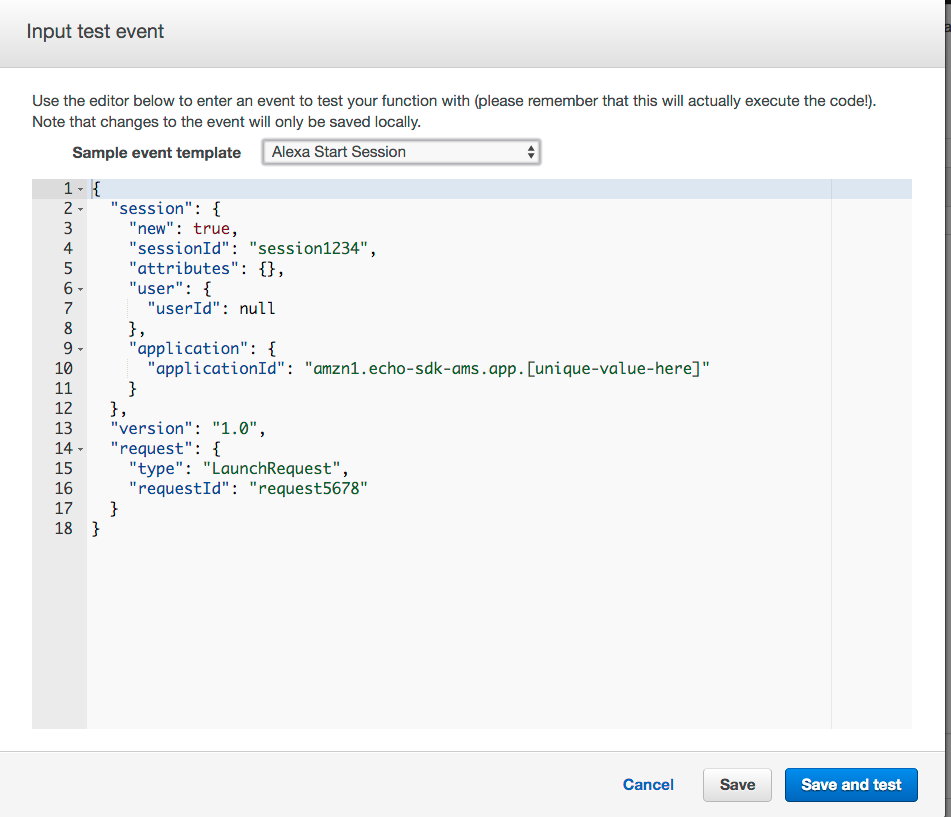
You should see text under the “Execution result” area resembling the following:
{
  "version": "1.0",
  "sessionAttributes": {},
  "response": {
    "shouldEndSession": false,
    "outputSpeech": {
      "type": "SSML",
      "ssml": "<speak>For delay information, tell me an Airport code.</speak>"
    },
    "reprompt": {
      "outputSpeech": {
        "type": "SSML",
        "ssml": "<speak>For delay information, tell me an Airport code.</speak>"
      }
    }
  }
}
If you aren’t receiving this response, there are a few things you can check. Verify that:
index.js.At this point, the skill service we wrote is live. Now we can move on to getting the skill interface set up.
The AWS Lambda instance is live and we’ve got its ARN value copied, so now we can start configuring the skill interface to do its work: resolving a user’s spoken utterances to events our service can process. Go to the Alexa Skills Kit Portal and click “Add a New Skill”. Enter “Airport Info” for “Name” and “Invocation Name”.
The value for “Invocation Name” is what a user will say to Alexa to trigger the skill. Paste the ARN you copied in the Endpoint box (make sure the “Lambda ARN” button is selected). The Skill Information page should look like this:
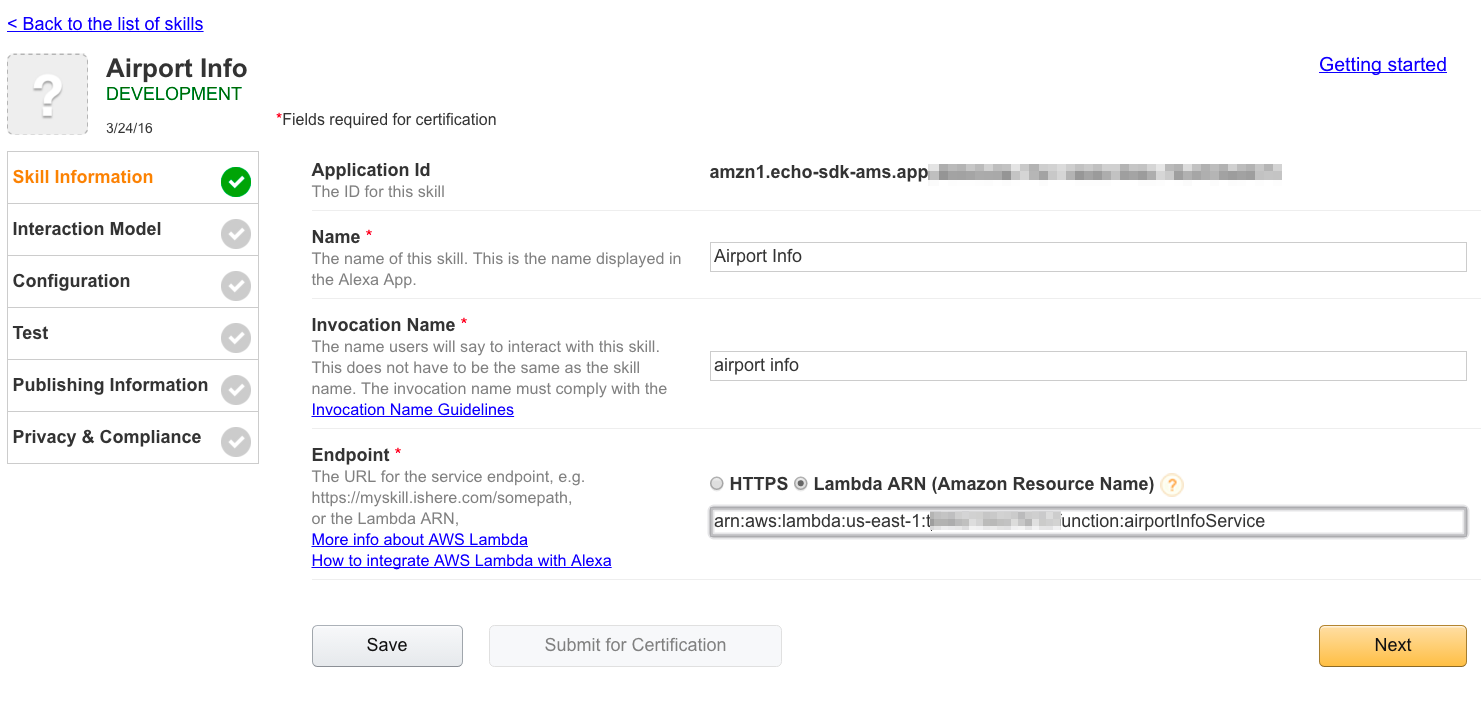
Click “Next” to proceed to the Interaction Model page.
We’ve already got the values needed for the Interaction Model page, thanks to the work we did in our post on using alexa-app and alexa-app-server.
Let’s refer back to the local test page for the skill we wrote earlier, at http://localhost:8080/alexa/airportinfo. (If you stopped the service locally earlier, run node server in the alexa-app-server examples directory.)
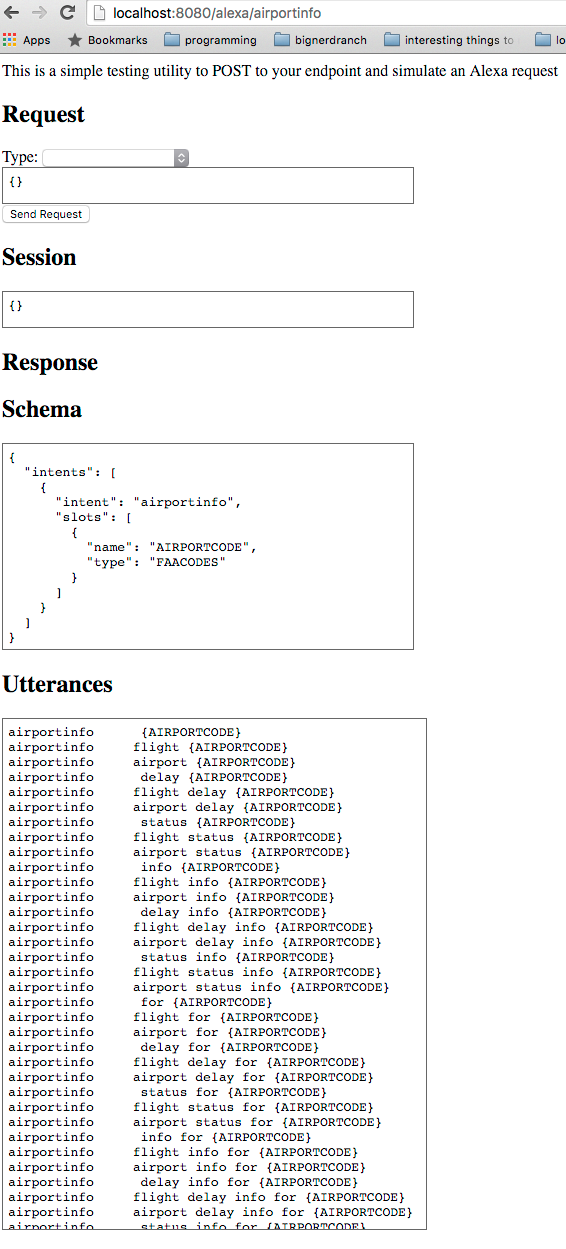
Copy the values from the “Schema” and “Utterances” fields on the local server test page and paste them into the respective fields on the “Interaction Model” page, like so:
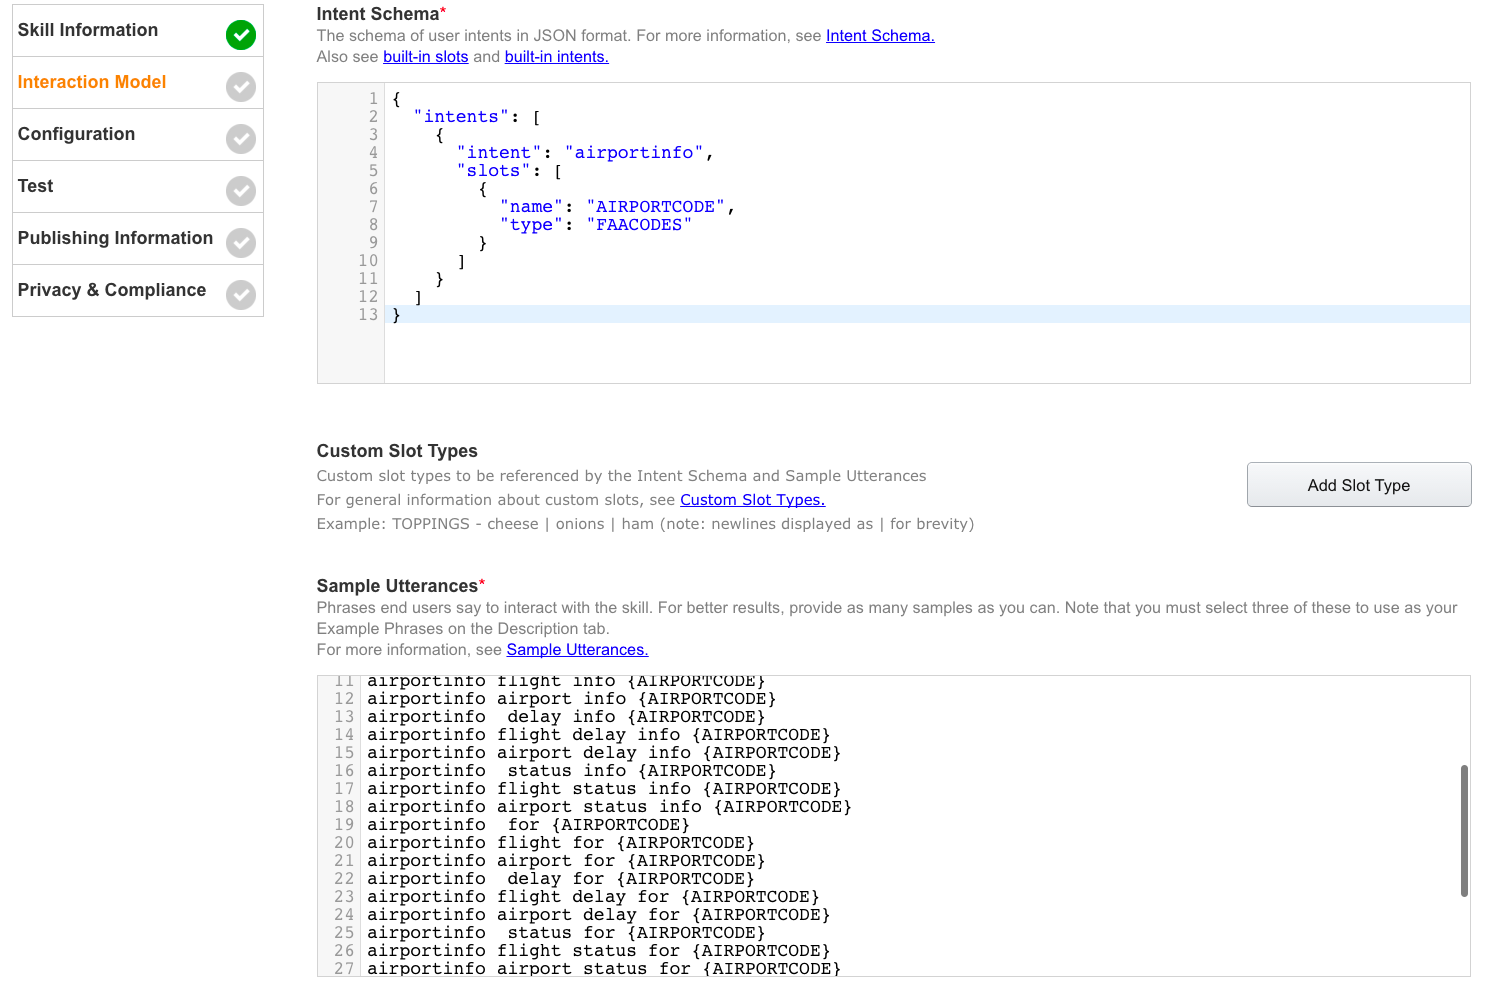
Our skill also uses a custom slot type called FAACODES that we need to define on the Interaction Model page. A custom slot type helps teach the skill interface how to recognize what a user has said, and sends it to the server as a variable.
Remember when we tested locally and provided “ATL” as a value for the airportInfoIntent’s AIRPORTCODE slot? In a real skill, the skill interface has to figure out what the user said in order to get this value—and the custom slot type definition in the Interaction Model makes it possible.
To create the custom slot type, click “Add Slot Type” and input FAACODES under “Enter Type”. You can download our list of all of the FAA Airport Codes, then paste those values into the “Enter Values” box and click “OK”.
Now FAACODES is a real Custom Slot Type that the skill interface can work with!
Now, let’s advance to the “Test” page in the skill interface so that we can verify that the deployed skill works correctly. Under the “Service Simulator” section of the page, enter “about status info for ATL”. This still simulates a user’s spoken words, but will test that a resolution between the slot type and sample utterances takes place as expected.
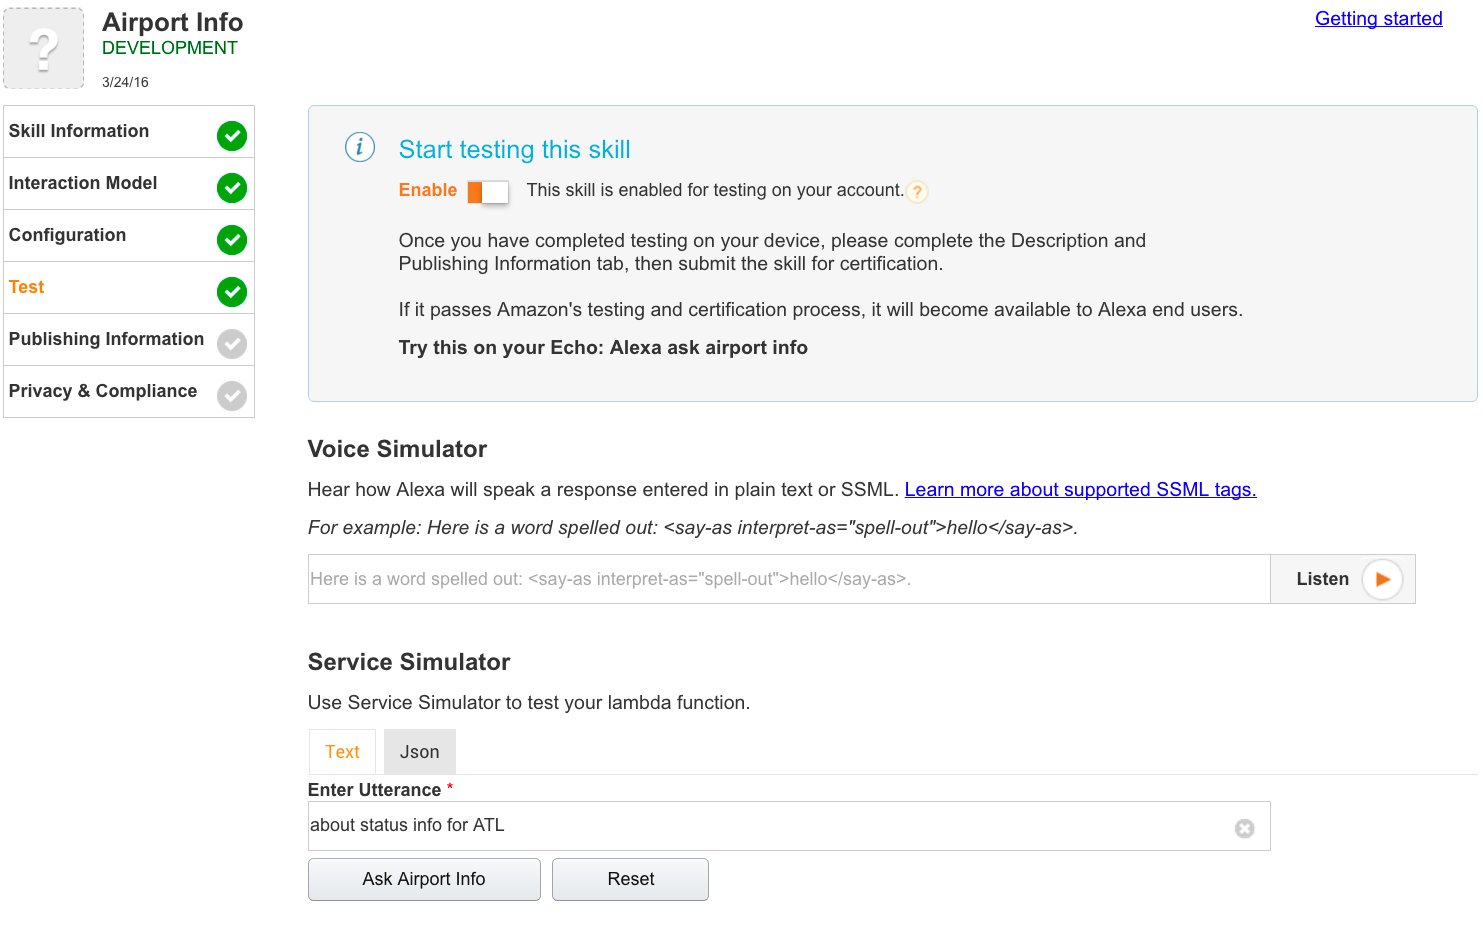
Click “Ask Airport Info”. If everything works as planned, we get the following in the “Lambda Response” area:
{
  "version": "1.0",
  "response": {
    "outputSpeech": {
      "type": "SSML",
      "ssml": "<speak>There is currently no delay at Hartsfield-Jackson Atlanta International. The current weather conditions are Partly Cloudy, 65.0 F (18.3 C) and wind South at 10.4mph.</speak>"
    },
    "shouldEndSession": true
  },
  "sessionAttributes": {}
}
Success! You can click the play icon in the bottom right of the Service Response panel to hear Alexa output the request, and if you have an Amazon Echo or any Alexa-enabled device handy, you can also test the Airport Info skill there.
Skills that are in staging can be accessed by a device signed on with the same development account. Test the skill on your device by saying: “Alexa, ask airport info about airport status for ATL.” Alexa should respond with the text we saw in the test we did in the simulator.
To learn more about registering or if you’ve already set up your device using an account other than your Amazon developer account, follow these steps from Amazon.
Congratulations! Your skill interface and skill service are now live in the staging environment, and you’ve tested it there. In Part 4 of this series, we’ll take the final step of going live with our skill: submitting it for Amazon review so that it can be enabled on devices around the world.

Clients leave when they feel that their needs aren’t being met. The strength of your client-partner relationship relies on a deep understanding of your client’s...

Responding to change is a key tenant of Agile Software Development. Predicting change is difficult, but software can be developed in a manner that...

A lot of this confusion surfaces around the scope of machine learning. While there is a lot of hype around deep learning, it is...