
Now Available React Programming: The Big Nerd Ranch Guide
Front-End ReactBased on our React Essentials course, this book uses hands-on examples to guide you step by step through building a starter app and a complete,...
Want to create a deployment workflow that is as easy as git push? By the end of this blog post you will have a deployment pipeline integrated with GitHub and Netlify. Your deployment pipeline will be triggered by every git push to your main branch. Netlify will see your update in GitHub and trigger your build process. Once the build completes successfully your site will be live. If you need to roll back to a previous deploy, you’ll be able to do so through Netlify.
To follow along with this post please sign up for free GitHub and Netlify accounts or have your credentials ready. For detailed instructions on installing git see GitHub’s Set up Git documentation.
To get started you need to create a new repository in GitHub.

git clone to clone your new repository to your local computer in your terminal.The repository for this blog post can be found here. Reference this repository to compare your changes as you follow along.
For detailed instructions see GitHub’s Create a repo and Cloning a repository documentation.
In order to run a local development server, you’ll need to install netlify-cli. The following instructions will install netlify-cli locally, but you can install it globally if desired. Netlify CLI provides the netlify dev command. You’ll define netlify dev as your start command to run a local development server.
Create a new file in your empty repository called package.json and save the following content to it:
{
  "devDependencies": {
    "netlify-cli": "*"
  },
  "scripts": {
    "build": "mkdir -p dist && cp -R src/* dist/",
    "start": "netlify dev"
  }
}
In package.json you defined your development dependency on netlify-cli, configured the build script to copy files from src to dist, and defined the start script to run netlify dev. When using a framework, use the build command provided by your framework instead.
Netlify uses a TOML configuration file define your build process and published content. Configure a netlify.toml file to define your build and dev settings.
Create a new file in the root of your repository called netlify.toml and save the following content to it:
[build]
command = "npm run build"
publish = "dist"

[dev]
publish = "src"
In package.json you implemented the build script to copy files from src to dist. The [build] section tells Netlify how to build your project. You can run your build by executing npm run build in your terminal. Since you want Netlify to run your build, you set command to npm run build. The value used in command can be replaced by the build step for the framework you are using. The publish setting defines where Netlify will serve static content from. You set publish to the output directory of your build command (dist).
The [dev] section tells Netlify how to run your project for local development. Just like in the [build] section, the publish setting defines where Netlify will serve static content from. This section also has a command setting that can be set to run the local development server for your framework. In this case you are only serving up static files and Netlify will handle that for you by default, so no command setting is needed.
Since we configured Netlify to serve development content from the src directory you can create that directory with the mkdir src command in your terminal or through your code editor.
Next, create a new HTML document in src/index.html and save the following content to it:
<!DOCTYPE html>
<html>

<head>
  <meta charset="utf-8" />
  <meta name="viewport" content="width=device-width, initial-scale=1" />
  <title>Getting Started with Netlify: Creating your first Netlify Site</title>
</head>

<body>
  <h1>Getting Started with Netlify: Creating your first Netlify Site</h1>
  <p>Hello, world!</p>
</body>

</html>
In this step you’ve created a simple Hello, world! webpage that you can deploy to Netlify.
Before installing your dependencies you should create a .gitignore file in the root directory and save the following content to it:
node_modules
dist
This will prevent your node_modules, and dist directories from being included in your git commit next.
You now have all the files you need to deploy to Netlify. Take a moment to add, commit, and push your changes to GitHub with the following commands in your terminal:
git add -A
git commit -m "My first Netlify Site"
git push origin main
Now you are ready to run npm install to install netlify-cli locally. This step will create the node_modules directory for your dependencies. Once npm install completes it will output a summary of the installation.

Run npm start in your terminal to start netlify dev as defined in package.json. Netlify Dev will detect that no framework was defined and serve static content from your publish directory which is src in this case. Netlify Dev will print out the local development URL, open your web browser with that URL, and continue running in your terminal. You should now see the rendered version of your index.html file in your browser with your “Hello, world!” message.

At this point you have a local development environment running, but have not yet connected your repository to Netlify. Terminate the local development server by holding the “control” key and pressing the “c” key (also referred to as ^C on a Mac).

From your Netlify Team Overview screen click New site from Git and follow the instructions.


netlify.toml file and pushed your changes to GitHub you’ll notice that this screen is already configured with your settings. 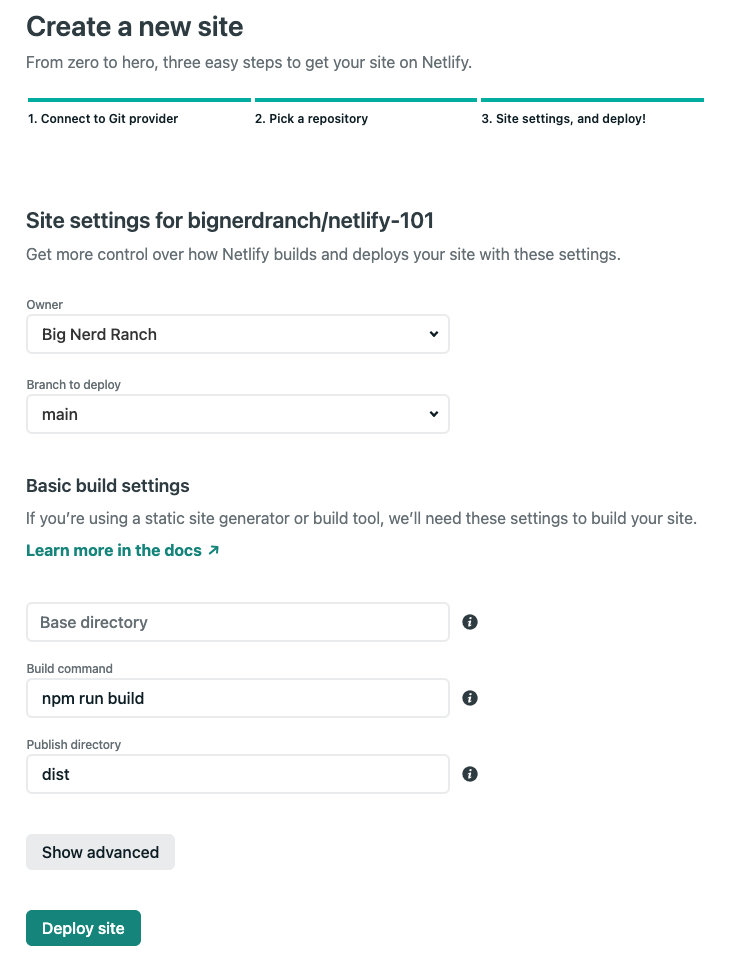
Starting Up. Click on your build from the “Production deploys” list which will take you to the Deploy log for that build.

https://<YOUR-SITE-NAME>.netlify.app site on the Deploys page. This will open a new window where you will see the same “Hello, world!” page you saw in local development earlier now live in production on Netlify.
Well, you’d probably like to update your site, so go ahead and get the development server running again with npm start. Now make some changes to your src/index.html and reload the page in your web browser. When you are satisfied with your changes in local development then add, commit, and push your changes to the main branch to trigger a new deploy. Head over to Netlify to view the Deploy log. Once your site is live you can view the changes in production.
If you need to roll back to a previous version of the site for any reason, you can do so through Netlify. From the Deploys page, you’ll notice that the most recent deploy is at the top and is marked as Published. 
Click on a previous deploy. This will bring you to the deploy log where you will find a Preview deploy link and a Publish deploy button. Use the Preview deploy link to review the deploy and make sure it’s the one you want to roll back to. Use the Publish deploy button to make that deploy the live deploy. 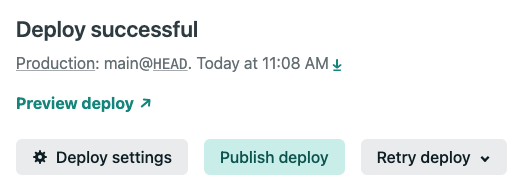
Head back to the Deploys page and notice that your previous deploy is now marked as Published. 
You now can update your website with a git push and can instantly roll back to a previous deploy if you need to. There is a lot more Netlify has to offer. Stay tuned for more! 🙌

Based on our React Essentials course, this book uses hands-on examples to guide you step by step through building a starter app and a complete,...
Svelte is a great front-end Javascript framework that offers a unique approach to the complexity of front-end systems. It claims to differentiate itself from...

Large organizations with multiple software development departments may find themselves supporting multiple web frameworks across the organization. This can make it challenging to keep...