

Now Available React Programming: The Big Nerd Ranch Guide
Front-End ReactBased on our React Essentials course, this book uses hands-on examples to guide you step by step through building a starter app and a complete,...
In the last post, we started building an “umbrella” Ember application for mounting a couple Ember Engine applications. Engines make it easier for a development team to separate UX concerns and split the codebase into separate .js files that can be lazy-loaded.
Last time, we were working on an Ember app called large-company-site. In this post, you will create an Ember Engine in a separate repository and link the engine to the umbrella application.
Start by changing directories in the terminal to leave the large-company-site directory, then create a new Ember Addon:
cd ../
ember addon external-admin
cd external-admin
Ember-CLI blueprints don’t yet support creating an engine, but it will soon with the command ember engine [engine-name].
The nice thing about creating an external Ember Addon is you can use the Ember-CLI generator to add application files from the command-line. However, the first file we need to add is an engine.js file in the external-admin/addon directory. At this point, it has to be done manually.
Open the new external-admin project in your editor, then create a file at external-admin/addon/engines.js and add the following:
import Engine from 'ember-engines/engine';
import Resolver from 'ember-resolver';
import loadInitializers from 'ember-load-initializers';
import config from './config/environment';

const { modulePrefix } = config;
const Eng = Engine.extend({
  modulePrefix,
  Resolver
});

loadInitializers(Eng, modulePrefix);

export default Eng;
Next, install the HTMLBars NPM module via the terminal in the external-admin project:
npm install ember-cli-htmlbars --save
The last option --save will add HTMLBars as a dependency entry in package.json.
Next, add a routes.js to the addon directory with the following bootstrap code:
import buildRoutes from 'ember-engines/routes';

export default buildRoutes(function() {
// route map
});
Once you have a router file, you can add some routes to your engine. Our admin application should have access to “posts” and other website details, so we will need routes to list, show, create and edit posts. From the terminal, use ember g to generate routes for “posts”, “post”, “posts/new” and “post/edit”:
ember g route posts
ember g route post
ember g route posts/new
ember g route posts/edit
With the route and template files created, you need to manually add routes to the routes file. Open external-admin/addon/routes.js and add the following:
 import buildRoutes from 'ember-engines/routes';

 export default buildRoutes(function() {
   // route map
+  this.route('posts', function() {
+      this.route('new');
+  });
+  this.route('post', function() {
+      this.route('edit');
+  });

 });
The last two setup files for ember engines are external-admin/config/environment.js and external-admin/index.js. These files need to pass a reference to the engine module to the parent application after the addon is loaded. Add the following to environment.js:
 /*jshint node:true*/
 'use strict';

-module.exports = function(/* environment, appConfig */) {
-return { };

+module.exports = function(environment) {
+  const ENV = {
+    modulePrefix: 'external-admin',
+    environment: environment
+  }
+
+  return ENV;
+};
Add the following to index.js:
 /* jshint node: true */
+const EngineAddon = require('ember-engines/lib/engine-addon');
 'use strict';

-module.exports = {
+module.exports = EngineAddon.extend({
+  name: 'external-admin',
+  lazyLoading: true
-};
+});
The environment.js and index.js files will pass the engine’s name and settings to the parent application for “lazily” mounting the engine inside the parent’s router. With these in place, you can use the engine’s routes as if they were built into the parent application.
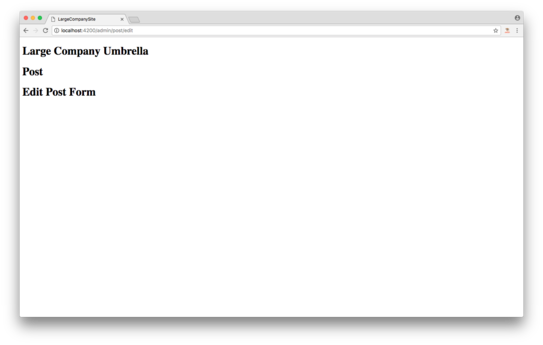
To finish the view layer of our admin engine, edit the *.hbs files in external-admin/addon/templates by adding simple headline elements describing the route page:
You’ve created the basic shell of an Ember Engine! Now it’s time to save it to Github (or any cloud storage service) to be loaded via npm. We have uploaded our example external-admin to a public github repo so you can install the ember-engine from our repo to test. In the terminal, switch from the external-admin directory back into the large-company-site directory.
cd ../large-company-site
Install the engine via ember install using the remote git repo:
ember install https://github.com/bignerdranch/ember-engine-external-admin.git
This will download the ember engine into node_modules from the master branch. Note that every time you commit changes changes to the external-admin repo, you will have to reinstall external-admin in the parent application.
Now for the moment of truth! Run ember s from large-company-site:
ember s
Open a browser and navigate to localhost:4200/admin/posts, localhost:4200/admin/posts/new, localhost:4200/admin/post, localhost:4200/admin/post/edit. You should recognize the headlines you created in your engine route templates!
The noble task of breaking down your monolithic Ember application into engines has just begun. In the next installment, you will learn about sharing services and links between engines to facilitate communication between engines and the umbrella application.
Based on our React Essentials course, this book uses hands-on examples to guide you step by step through building a starter app and a complete,...
Svelte is a great front-end Javascript framework that offers a unique approach to the complexity of front-end systems. It claims to differentiate itself from...

Large organizations with multiple software development departments may find themselves supporting multiple web frameworks across the organization. This can make it challenging to keep...