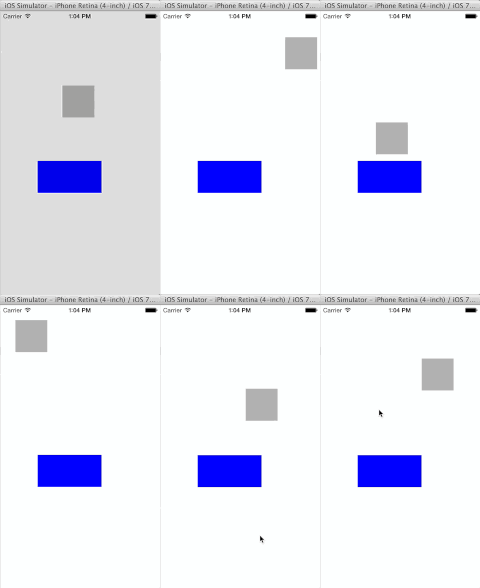
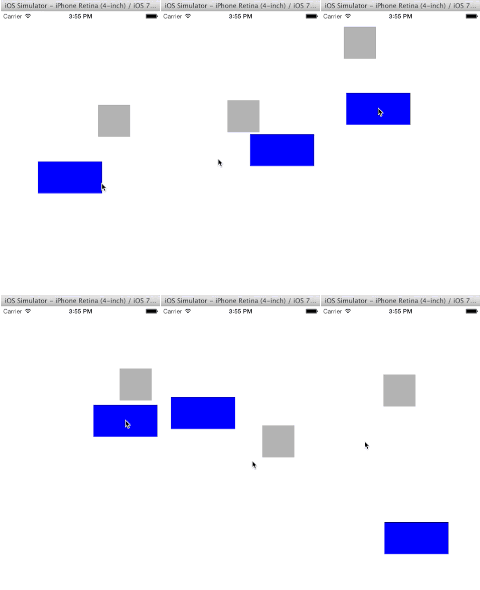
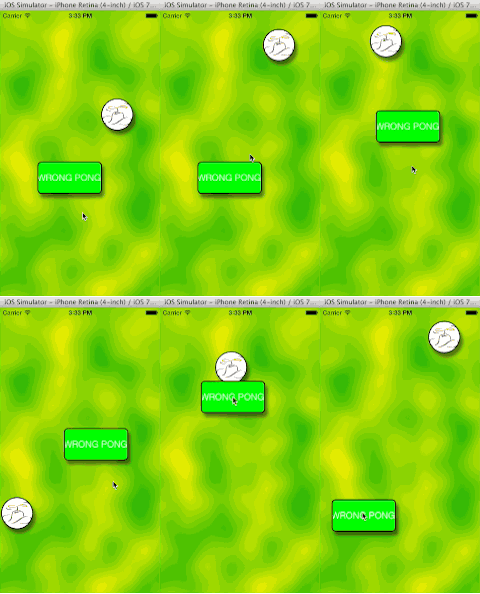
UIKit Dynamics is one of the more fun parts of iOS 7, giving us user interface elements that mimic real physical objects. They can bump into each other, move and spin, fall with gravity and bounce around on invisible springs and strings. I decided to build an app that plays Pong using only UIKit in order to see how it all worked.
The post UIKit Dynamics and iOS 7: Building UIKit Pong appeared first on Big Nerd Ranch.
]]>UIKit Dynamics is one of the more fun parts of iOS 7, giving us user interface elements that mimic real physical objects. They can bump into each other, move and spin, fall with gravity and bounce around on invisible springs and strings. I decided to build an app that plays Pong using only UIKit in order to see how it all worked.
Getting the ball rolling
To set up, I created a project with an empty view and programmatically added two views, one for the ball and one for the paddle. I made the ball square and the paddle a wide rectangle. I also created an animator for the system. The animator is just an instance of UIAnimator and runs the physics engine for the system.
To start the ball moving, it needs a push. So I created a push behavior for the ball and made it instantaneous, instead of continuous, so the ball would coast.
    // Start ball off with a push
    self.pusher = [[UIPushBehavior alloc] initWithItems:@[self.ballView]
                                                   mode:UIPushBehaviorModeInstantaneous];
    self.pusher.pushDirection = CGVectorMake(0.5, 1.0);
    self.pusher.active = YES;
    // Because push is instantaneous, it will only happen once
    [self.animator addBehavior:self.pusher];
This is a bit inverted from how we might think of it in English, or in object-oriented programming in general. You would think that something like [ball push] would work. But by making the various laws of physics into objects you can easily modify them; if they were just methods on the view objects, then you would have an explosion of methods like [ball push], [ball bounce], [ball slowlySlideInclineUntilYouHitSomething]. So it is a little neater to add the behaviors to the animator instead of the items they act on.
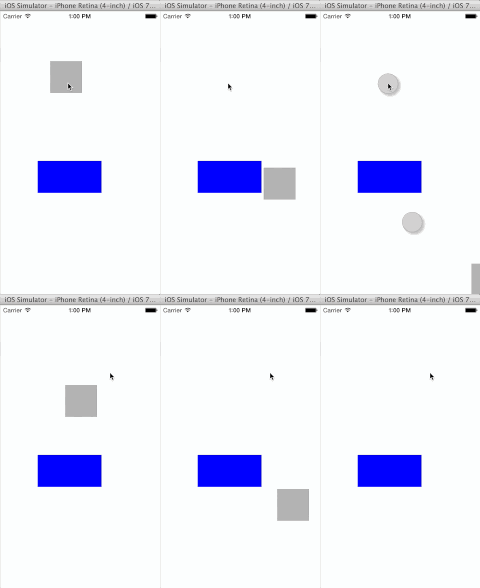
Here is what it looked like:
Getting on a collision course
The push behavior imparts some momentum to the ball, and it moves. A good start, but it flies right through the paddle and off the view! By default there is no collision of views, so I added a collision behavior.
    // Add collisions
    self.collider = [[UICollisionBehavior alloc] initWithItems:@[self.ballView, self.paddleView]];
    self.collider.collisionDelegate = self;
    self.collider.collisionMode = UICollisionBehaviorModeEverything;
    self.collider.translatesReferenceBoundsIntoBoundary = YES;
    [self.animator addBehavior:self.collider];
This will make the paddle and ball collide with each other and the walls. The walls are the sides of the reference view that we set up with the animator: the view containing the ball and paddle. If you wanted to just collide with the walls or each other, you could change the collisionMode property of the behavior.
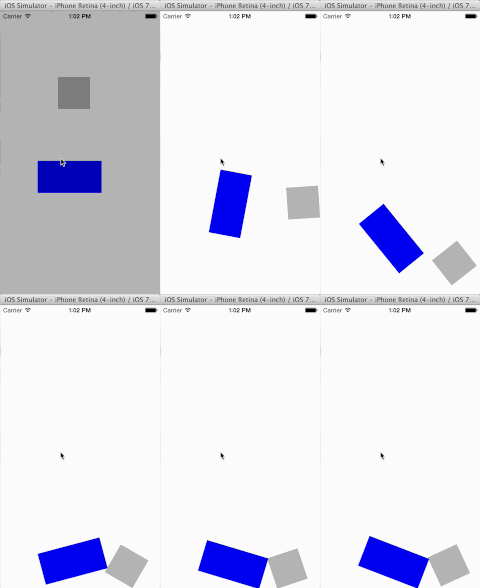
Running the app, I was surprised to see this:
The ball and paddle collide and they spin! This makes sense and is kind of fun, but some sort of rectangular snooker is not what I was going for here.
Keeping the views from spinning requires setting some of their dynamic properties. Once again there’s a bit of indirection involved; you have to set up a set of dynamic item behaviors and assign the views to them. This will turn off rotation:
    // Remove rotation
    self.ballDynamicProperties = [[UIDynamicItemBehavior alloc] initWithItems:@[self.ballView]];
    self.ballDynamicProperties.allowsRotation = NO;
    [self.animator addBehavior:self.ballDynamicProperties];
    self.paddleDynamicProperties = [[UIDynamicItemBehavior alloc] initWithItems:@[self.paddleView]];
    self.paddleDynamicProperties.allowsRotation = NO;
    [self.animator addBehavior:self.paddleDynamicProperties];
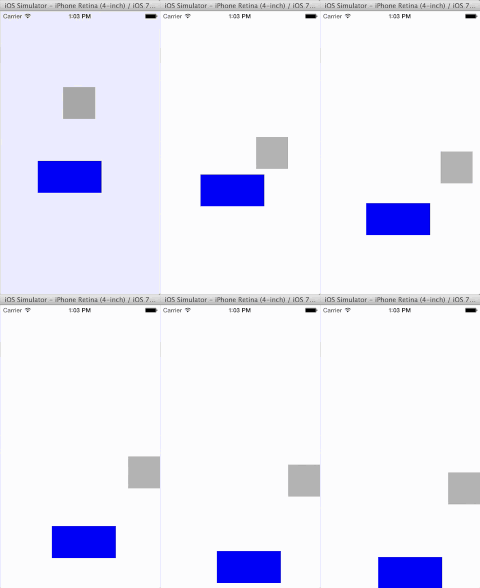
With this the paddle doesn’t spin, but it does move around a bit. This confounded me a bit; how could I make the ball bounce off the paddle without having the paddle move?
What I did was make the paddle really, really heavy. I thought of making it a ping pong ball bouncing off a rock instead of a tennis ball hitting a soccer ball. I changed the paddle’s density, which is exposed in the dynamic item behavior:
    // Heavy paddle
    self.paddleDynamicProperties.density = 1000.0f;
The default density is 1.0, so this made the paddle 1000 times heavier. The ball will bounce without the paddle moving. Although I do not like using a magic number like 1000, when I tried CGFLOAT_MAX the animator threw an exception.
The bounce is still not ideal; the ball slows down after a bit and the collision uses up some energy. Dynamic behavior properties once again fix this. Make the ball perfectly elastic, which means all of the kinetic energy in a collision will get transferred.
    // Better collisions, no friction
    self.ballDynamicProperties.elasticity = 1.0;
    self.ballDynamicProperties.friction = 0.0;
    self.ballDynamicProperties.resistance = 0.0;
This also sets the friction of the ball 0, which keeps it from getting stuck on the edge, and the resistance to 0, which keeps it from slowing down as it flies through the view. Now it is starting to looks like pong!
You may notice that there are a lot of objects being created to do this. UIKit Dynamics is a composable system, meaning you figure out what rules you want to apply to each object and add them to it. Want that view to fall? Add a gravity behavior. Don’t want it to disappear off the bottom of the screen? Add a collision with the screen boundary.
Composable systems can be nice because they give you lots of ways to combine effects and generate new ones, but the cost is having to learn lots of classes. To get this far I needed push, collision and dynamic behavior classes.
Making a move
Finally, the user needed to be able to move the paddle. This revealed another interesting aspect of UIKit Dynamics, which is that it wants to control the properties of the animated objects. When I set the center point of the paddle, it would just flicker and then jump back to where it was previously (if it did anything at all). This is because the animator sets the center and transform property of the view every tick of the animation.
To modify the item properties yourself, you need to tell the animator that you’ve changed the item properties using updateItemUsingCurrentState:. Doing this lets the user tap and move the paddle, which I did in a tap gesture handler:
    self.paddleView.center = [gr locationInView:self.view];
    [self.animator updateItemUsingCurrentState:self.paddleView];
I could also have used a UIAttachmentBehavior or UISnapBehavior to move the paddle; this could have the paddle fly to the new position instead of teleporting. But a side effect of this is if the paddle hits the ball while it is moving, it adds more energy to the ball, making it move too quickly and erratically. I would need to adjust the dynamic item properties to keep the ball at a sane speed. This can involve hierarchical behaviors and how the animator traverses the behavior graph; important stuff, but something for another blog post!
If you want to check out the code, look at our iOS7Demos project on Github and play with WrongPong. We cover UIKit Dynamics and many other new iOS 7 topics in our Advanced iOS class. I’ll also be speaking about it this Friday at CocoaConf Columbus and again in October at CocoaConf Boston.
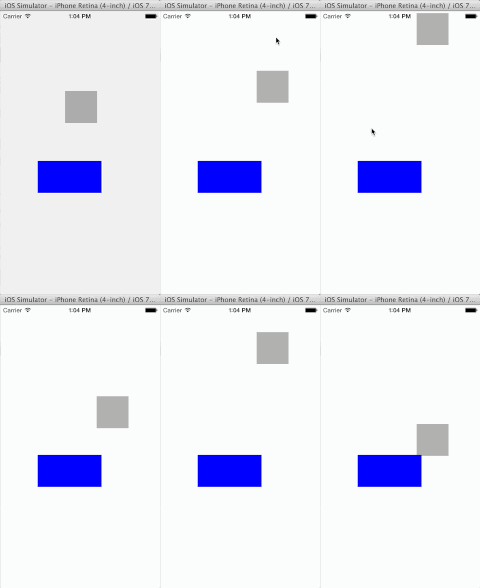
I’ll leave you with a little animation of the app after I messed with the snap behavior and put some styling of the views. Ready for the app store, don’t you think?
The post UIKit Dynamics and iOS 7: Building UIKit Pong appeared first on Big Nerd Ranch.
]]>We’ve rebooted our OpenGL class! OpenGL is one of the most popular 3D graphics APIs, and our class now focuses on OpenGL ES (“Embedded Systems”), the flavor used by iOS, Android and WebGL. I’ve been developing the new curriculum and couldn’t be more excited about teaching the next session in early March.
The post OpenGL ES Course Offers a New Dimension of Learning appeared first on Big Nerd Ranch.
]]>We’ve rebooted our OpenGL class! OpenGL is one of the most popular 3D graphics APIs, and our class now focuses on OpenGL ES (“Embedded Systems”), the flavor used by iOS, Android and WebGL. I’ve been developing the new curriculum and couldn’t be more excited about teaching the next session in early March.
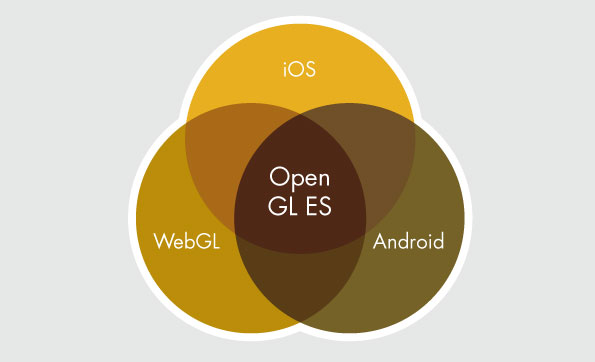
Though OpenGL is one of the oldest APIs around, it went through quite a revolution a few years ago, when it moved from the fixed function pipeline to today’s programmable pipeline. And thanks to the mobile revolution, adoption of the programmable pipeline has only accelerated. This, combined with so many software engineers moving to mobile development, convinced us to rework the class we’ve been offering for 10 years.
In the new and improved OpenGL ES class, we start by focusing on the programmable pipeline, getting into shaders from the first morning and continuing all week. No longer will they be a mysterious entity that you find out about at the end of the book; instead, you’ll be writing code to execute on the GPU from the start.
Using programmable shaders comes at a cost; OpenGL no longer provides handy things like transformation stacks for the camera or built-in rotation matrix calculations. Developers can write their own or use a library, but some OpenGL guides have written very extensive modules to make up for the change. Our rebooted course uses the open-source glm library, which is patterned after the OpenGL Shading Language, for vector and matrix manipulation in C++. In addition, we’ll also take a look at a few other libraries and see what makes them tick.
Another great addition to the class is WebGL, the OpenGL ES API in your browser that is accessed with JavaScript. This means that testing a WebGL program requires only reloading a web page and not a full-blown edit – compile – execute loop. You won’t be stuck waiting for compiles, and faster development means that we can stuff your brains with even more knowledge! Putting the 3D in a web page has the added advantage of giving you access to all sorts of HTML controls to manipulate your scenes.
Even if you don’t have experience in programming 3D graphics, don’t worry. We explain principles from the ground up, so you’ll learn all the necessary concepts and how they work together, from getting geometry on the screen to using special effects like bump mapping and particle systems. We even try to keep the math to a minimum; I promise there will be no eigenvectors. Well, maybe after dinner, back in the lab…
In our current landscape, OpenGL is the language for 3D programming. There are so many great things to learn that you’ll have to see them all in the course syllabus, but here are some of my favorites:
-
Write vertex and fragment shaders for full control over 3D rendering
-
Texture 3D objects procedurally and with images
-
Render point clouds and make animated particle systems
-
Understand how popular open-source projects use OpenGL
-
Pick arbitrary 3D objects in complicated scenes
-
Create higher-level scene graphs powered by OpenGL rendering
I’m proud to be bringing the Big Nerd Ranch’s OpenGL curriculum to the next level. If you’re interested in learning OpenGL ES and computer graphics from first principles in the time-honored Big Nerd Ranch tradition, sign up today and I’ll see you there!
The post OpenGL ES Course Offers a New Dimension of Learning appeared first on Big Nerd Ranch.
]]>Special guest post by Jonathan Blocksom, director of the Big Nerd Ranch DC office, and Advanced iOS course co-creator.
The post SceneKit in Mountain Lion appeared first on Big Nerd Ranch.
]]>Special guest post by Jonathan Blocksom, director of the Big Nerd Ranch DC office, and Advanced iOS course co-creator.
OK, you’ve updated to Mountain Lion and the latest Xcode, now what? Time to play with SceneKit, the new 3D graphics API!
SceneKit is a high level 3D graphics on Mac OS X 10.8; it’s been favorably reviewed and some folks are frankly a bit nuts about it. SceneKit creates a scene graph, a more abstract way of working with 3D shapes and rendering than OpenGL — sort of like dealing with web pages instead of strings. It’s very well integrated with other Mac APIs and has some pretty neat features.
Like many new APIs, it’s woefully documented; fortunately it doesn’t seem to diverge much from 20 years or so of scenegraph development. Here at BNR we’ve been able to get up to speed on it pretty quickly, and now it’s your turn.
Let’s make a little app with a few 3D shapes that jump when you click on them.
Start by creating a new Cocoa project in Xcode, I called mine HelloShapes.
-
Add the
SceneKitandQuartzCoreframeworks. -
Add a new Objective-C class that subclasses
NSViewControllerand call it**HelloShapeViewController**. -
Open the xib file and add an
NSViewControllerobject, changing the class toHelloShapeViewController. -
Select the view of the main window and change its class to
**SCNView**. -
Connect the SCNView to the view outlet of the
HelloShapeViewControllerobject.
Now add a bit of code to make sure things are working. Go into HelloShapeViewController.m and add the import for SceneKit:
#import <SceneKit/SceneKit.h>
Now add an awakeFromNib method in the implementation:
- (void)awakeFromNib
{
    SCNView *sceneView = (SCNView *)self.view;
    sceneView.backgroundColor = [NSColor blueColor];
}
Build and run and you should get a pleasant blue background, just waiting for a 3D scene!
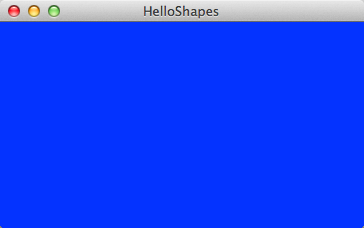
One of the selling points of SceneKit is that designers can build fancy 3D artwork with their tools of choice like Maya or 3D Studio Max. They export their files as Digital Asset Entities (.dae) files, also known as COLLADA. Then programmers embed the files in their apps and have their programs hook in to the parts of them. If you wanted to, at this point you could add a 3D scene and show it in the view, just using Interface Builder.
But our goal is to understand what’s inside of SceneKit, so instead of dropping in 3D data files we’re going to build our own from scratch. It’s the way we roll around here.
First let’s add a cube.
    // Create the scene and get the root
    sceneView.scene = [SCNScene scene];
    SCNNode *root = sceneView.scene.rootNode;
    // Create the cube geometry and node
    SCNBox *cubeGeom = [SCNBox boxWithWidth:1.0
                                     height:1.0
                                     length:1.0
                              chamferRadius:0.0];
    SCNNode *cubeNode = [SCNNode nodeWithGeometry:cubeGeom];
    [root addChildNode:cubeNode];
Can you see the cube? It’s not much to look at yet.
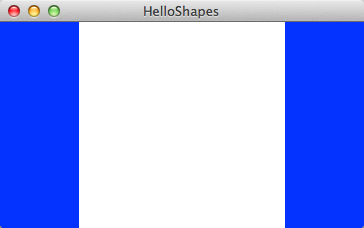
Let’s add a few more shapes and see what happens.
    // Add cylinder
    SCNCylinder *cylGeom = [SCNCylinder cylinderWithRadius:0.5 height:1.0];
    SCNNode *cylNode = [SCNNode nodeWithGeometry:cylGeom];
    cylNode.position = SCNVector3Make(1.5, 0.0, 0.0);
    [root addChildNode:cylNode];
    // Add sphere
    SCNSphere *sphereGeom = [SCNSphere sphereWithRadius:0.5];
    SCNNode *sphereNode = [SCNNode nodeWithGeometry:sphereGeom];
    sphereNode.position = SCNVector3Make(3.0, 0.0, 0.0);
    [root addChildNode:sphereNode];
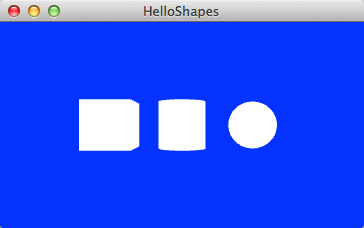
SceneKit is helpfully positioning the camera to include all three shapes in the shot so we can see their geometry a little better. Let’s see if we can help it with some lighting:
    SCNLight *light = [SCNLight light];
    light.type = SCNLightTypeDirectional;
    root.light = light;
A bit stark but we can work with it. We’re doing pretty well – in about 25 lines of very simple code we’ve got a neat 3D scene:
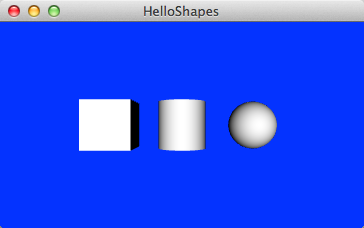
Now creating some shapes and lights is not that big a deal, scenegraph APIs have been able to do that for a long time. But SceneKit integrates with Core Animation, and that is a pretty big deal. Let’s make these shapes appear from out of nowhere:
    CABasicAnimation *startAnim = [CABasicAnimation animationWithKeyPath:@"opacity"];
    startAnim.duration = 1.0;
    startAnim.fromValue = @0.0;
    startAnim.toValue = @1.0;
    [root addAnimation:startAnim forKey:@"fadeIn"];
Try this and you’ll see the shapes fade in. And doesn’t it feel good to use those Objective-C Literals to keep things nice and tidy?
Next up let’s put some textures on the shapes to make them a bit more interesting:
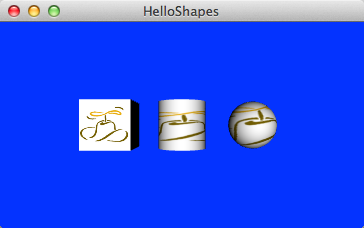
Time to take a step back for a bit. This code creates an object graph that looks a bit like this:
The scenegraph is a tree, and the root node is where all the other nodes descend from. Individual nodes are positioned relative to their parents, so you can build up hierarchical models and move the parts around without their parents, or you can move the parents and the other parts will come along. Think of a robot arm, move the base and the rest will move with it, or you could just move the elbow or wrist.
Nodes have geometry properties which define the shapes they represent. The geometry objects are shared; if you have a video game with a bunch of complicated spaceships you don’t need to define separate 3D data for each one. This helps OpenGL cache the data and store the scene in less memory.
The geometry objects also have materials, and that’s where we’ve set the texture. Materials have properties whose contents can be an NSColor, an NSImage, or a CALayer. Yes, a CALayer — that opens up all sorts of doors!
Let’s finish up this demo by making the shapes jump when the user clicks on one. If you’ve ever tried to pick a 3D object in OpenGL from a mouse click you’ll know how difficult this can be; SceneKit makes it easy. Set the controller as the next responder and add the following mouse handler:
    self.view.nextResponder = self;
}
- (void)mouseDown:(NSEvent *)theEvent
{
    NSPoint winp = [theEvent locationInWindow];
    NSPoint p = [self.view convertPoint:winp fromView:nil];
    CGPoint p2 = CGPointMake(p.x, p.y);
    NSArray *pts = [(SCNView *)self.view hitTest:p2 options:@{}];
    for (SCNHitTestResult *result in pts) {
        SCNNode *n = result.node;
        CAKeyframeAnimation *jumpAnim = [CAKeyframeAnimation animationWithKeyPath:@"position"];
        float x = n.position.x;
        jumpAnim.duration = 0.75;
        jumpAnim.values = @[
            [NSValue valueWithSCNVector3:SCNVector3Make(x, 0.0, 0.0)],
            [NSValue valueWithSCNVector3:SCNVector3Make(x, 1.5, 0.0)],
            [NSValue valueWithSCNVector3:SCNVector3Make(x, 0.0, 0.0)]
        ];
        jumpAnim.timingFunction =
            [CAMediaTimingFunction functionWithName:kCAMediaTimingFunctionEaseInEaseOut];
        [n addAnimation:jumpAnim forKey:@"jump"];
    }
}
Run it and click on a shape!
This only scratches the surface of what SceneKit can do. Animated materials, textures from views and video, 3D text, and custom shaders are all parts of it. Here’s some things you might try, just fork HelloShapes on Github and go nuts:
-
Set the
SCNViewallowsCameraControlproperty to true and zoom around with your mouse (note this swallows the events for the view controller’s mouseDown handler) -
Add some 3D text with the
SCNTextclass -
Put in an
SCNFloorand see them reflect off of it -
Group the shapes together and animate them all at once
-
Render a web page offscreen and put it on a shape
Have fun, and stay tuned for more about SceneKit and the other new SDKs in Mountain Lion!
(Got a hankering to learn more about OpenGL or Advanced iOS programming directly from the master himself? Join Jonathan in one of the courses he’s teaching in September and October.)
The post SceneKit in Mountain Lion appeared first on Big Nerd Ranch.
]]>